Texture Layering Techniques for Modern Wispy Sets
The era of the dense, solid block of uniform extensions is pretty much over. If your current sets look like a perfectly straight, razor-cut line across your client's lids, you're missing out on what people are actually booking. Clients want movement, weightlessness, and a look that has some actual personality. That’s why textured lash extensions have completely taken over.
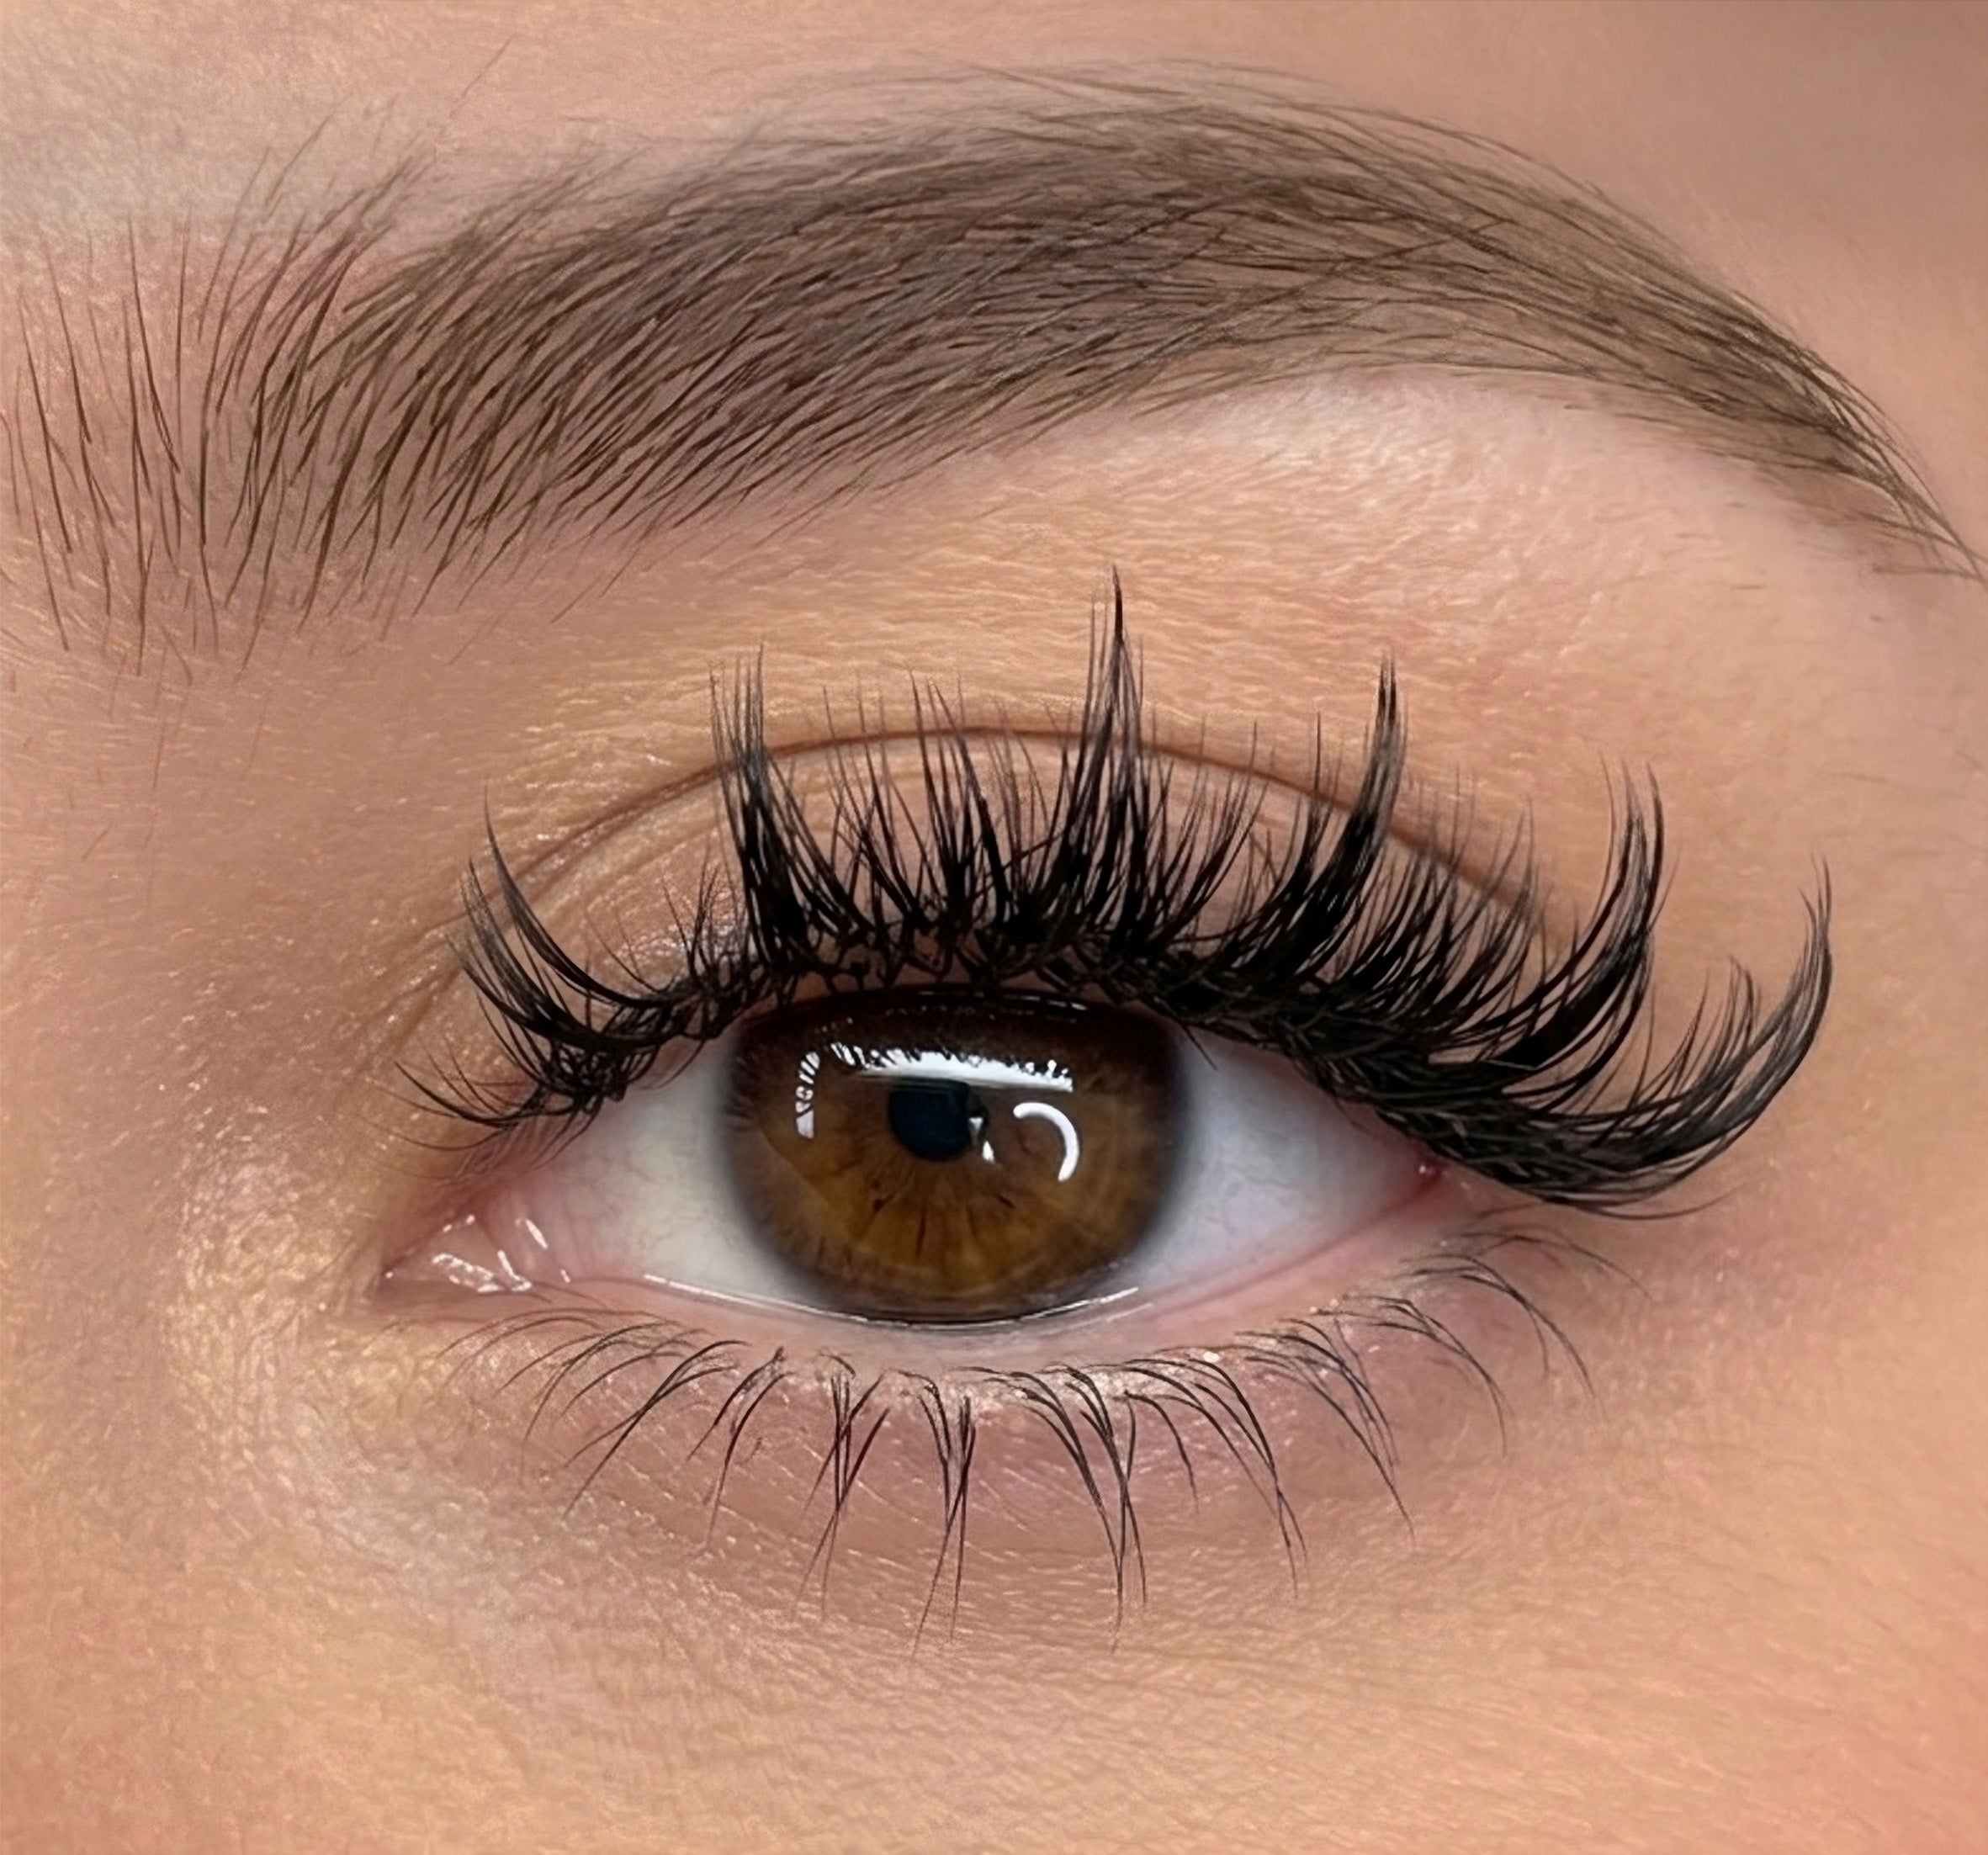
Texture works because it creates a high-low contrast that mimics how natural hair actually grows - staggered, uneven, and full of dimension. A uniform set can look incredibly heavy, almost like a piece of dark tape across the eye. Breaking up that top line with strategic spikes softens the overall look while still delivering the drama people pay for. If you want your sets to win hearts, mastering texture is how you shift from “ok” to “mesmerizing”.
When you understand how to manipulate depth, your relationship with your inventory changes. You stop looking at a tray of extensions as just a way to add length; you start seeing it as a tool to map out shadows and highlights. This shift is exactly what changes your business from a basic local service into a premium brand. Clients notice when a set is built specifically for their facial structure rather than being pulled off a generic template, and they will gladly reward you to keep that custom look on lock.
What Makes a Wispy Lash Set Look Professional
Seriously, there's nothing worse than those sets where a tech just randomly dots a few giant classic lashes over a basic set and calls it a day. It instantly turns into a clumpy, spider-leg mess that flops over the second they blink. If your peaks don't actually vibe with the rest of the fluff, it just looks like you messed up their fill.
The real test is durability. Your spikes need to stay standing completely upright without twisting or crossing over each other by week two. Your spacing has to be uniform across the entire map, and your background fans can't be so long or dense that they crowd out your peaks. It's all about managing that contrast. Giving the spikes enough room to stand out while keeping the baseline full enough that the client doesn't look like they have random gaps when they open their eyes.
Achieving this requires a deep understanding of fluid mechanics on the hair shaft. If your adhesive control is sloppy, your texturing will clump instantly, turning your intentional spikes into a tangled nightmare. You need to ensure that your background fluff remains airy and separated, which means managing your dipping depth with absolute precision. When the background stays soft, the spikes have a clean canvas to rise above, creating that sharp, high-definition look that pulls massive numbers on social media feeds.
Understanding Lash Layers
To pull off proper wispy volume lashes, you have to stop treating the lash line like a single row of hair. The human eyelid is a multi-level canvas, usually packed with three to five distinct horizontal rows. If you ignore these layers and just apply the same length from left to right, your top line is going to end up looking completely flat and blocky.
The trick to texture is exploiting these rows by working against them. Because the bottom layer sits closer to the cheek and the top layer sits higher up toward the brow, you have to adjust your lengths to manage that gap. If you want a perfectly straight set, you drop your lengths as you move up the rows. But for a true wispy look, you flip the script: you place your longest spikes strictly on that top layer so they shoot way past the background fluff.
By isolating the top row specifically for your texturing points, you prevent the natural lashes from tangling during the growth cycle. The middle and bottom rows are then packed with shorter, wider fans that build a dense, dark foundation near the skin line. This exact structural separation keeps the set looking clean and organized, even as the client's natural hairs go through their normal shedding process between touch-ups.
Popular Wispy Layering Techniques
Every seasoned artist has a few textbook ways to map out their texture, and mixing these strategies up is how you build a unique signature style.
Spike Layering
This is the foundational setup for creating the classic Kim K lashes look. You map out your primary peaks across the top layer of the eyelid, placing them roughly two to three millimeters longer than the background fans. Because these spikes are anchored entirely on the top row, they stay completely separated from the bulk of the set, rising like distinct, sharp pillars across the eye line.
Internal Texture Layering
If you want texturing that looks incredibly organic and messy in a calculated way, you need to start scattering smaller peaks through the middle layer as well. Instead of keeping all your spikes on one neat row, you blend different lengths inside the body of the set. This trick ensures that even when the top layer starts to shed, the middle layer steps up to maintain that jagged, piecey dimension.
Multi-Length Mapping
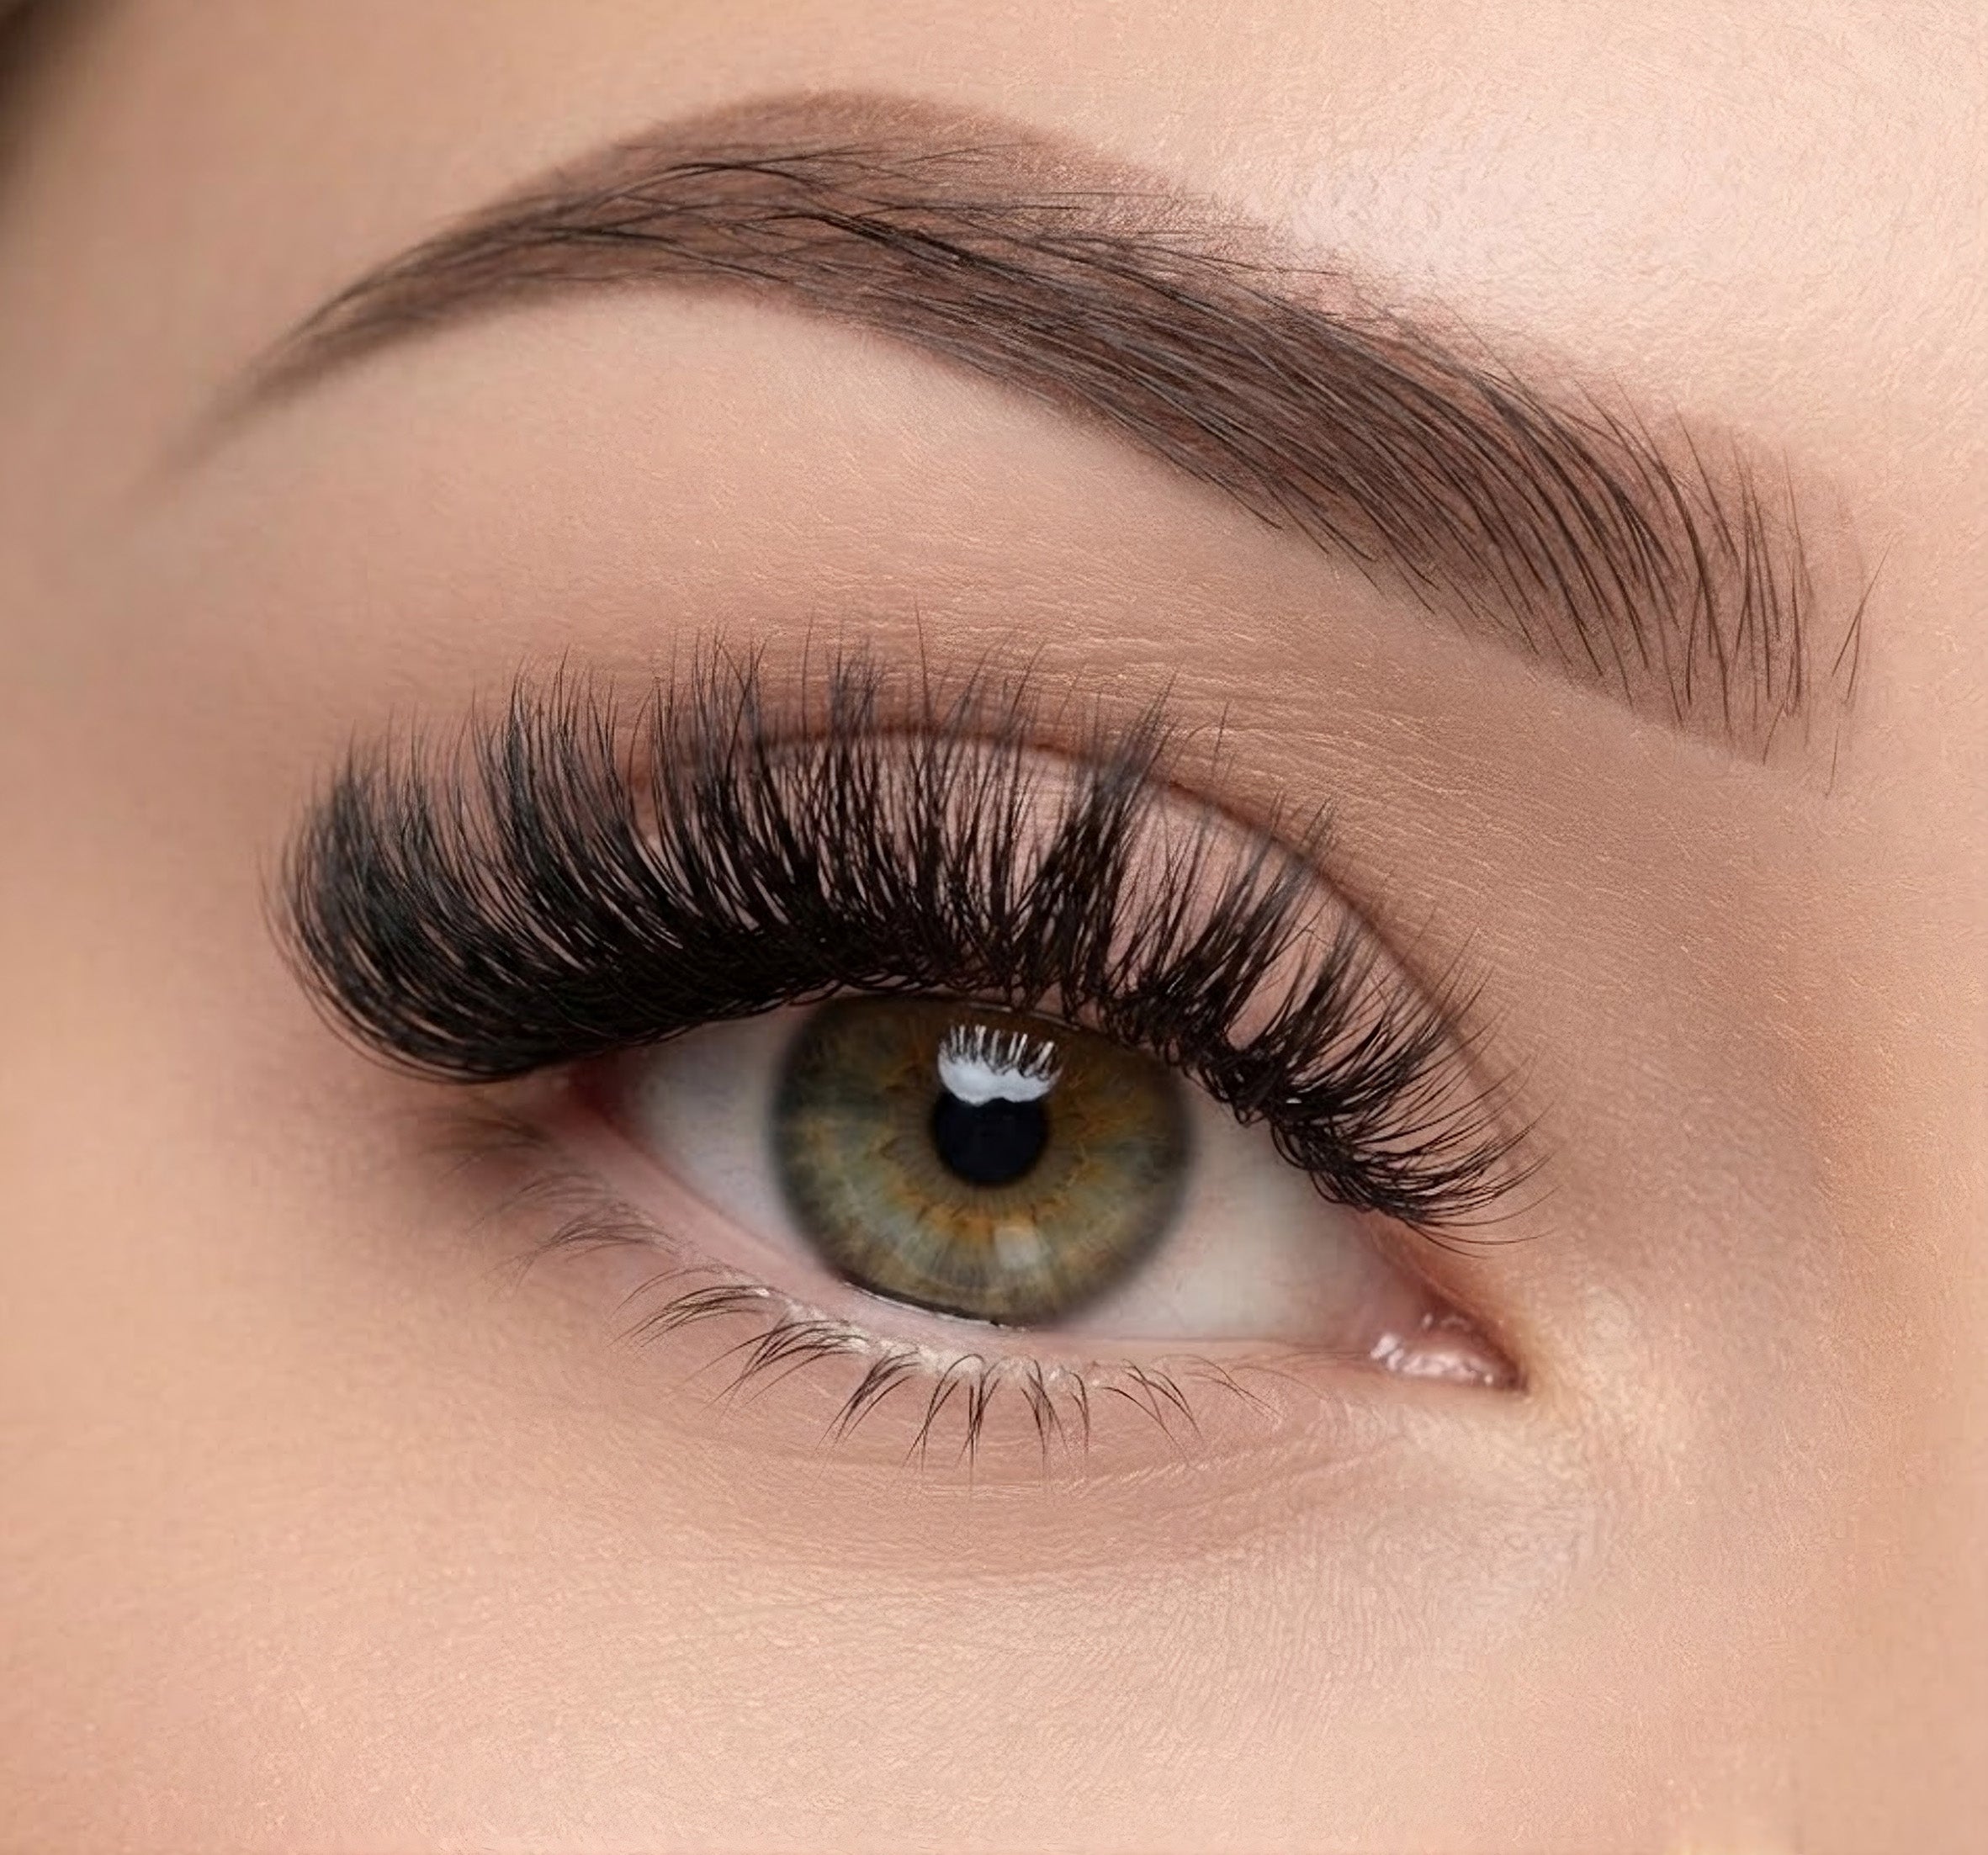
Ditch the basic two-length blueprint. For an elite wispy set, you should be jumping between four or five different lengths across your entire map. You might place a 9mm fan, skip to a 13mm spike, drop right back down to a 10mm fan, and then hit an 11mm transition helper on the very next hair. This constant, rhythmic zig-zagging builds an incredibly soft, feathered canopy with massive depth.
Wet-to-Wispy Fusion
This is a killer technique for delivering wet wispy lashes. You build your baseline density using tightly closed, unfanned bundles of individual lashes to give the set a piecey, heavy-mascara vibe. Once that dark foundation is locked in, you overlay your ultra-long texturing spikes on top. It gives you the perfect contrast of wet-look definition combined with sky-high wispy peaks.
Best Lash Diameters for Wispy Texture
Choosing the wrong thickness for your texture work will completely tank the set before the client even leaves the studio. If your spikes are too heavy, they will sag and twist; if your background fans are too thick, they will crowd out your peaks.
For your spikes, stay away from heavy classic lashes. Instead, build your spikes using closed volume bundles made from 0.05mm or 0.07mm premium fibers. Pulling four to six of these ultra-fine hairs off the strip and keeping the fan tightly closed gives you a bold, dark spike that has serious presence on the eye without putting dangerous weight on the natural hair follicle.
For the background filling, you want to drop down to ultra-light 0.03mm or 0.05mm diameters. The goal here is to make these fans as wide, airy, and soft as possible so they form a misty, cloud-like foundation. This extreme contrast between the dense, dark spikes and the soft background cloud is exactly what makes the texture pop from a distance. You can source excellent variety to build this high-contrast inventory by using professional lash extensions that hold their shape under daily studio wear.
Common Mistakes That Ruin Wispy Sets
The absolute fastest way to ruin a texture set is getting sloppy with your adhesive control. If you pick up too much glue on your spikes, that extra liquid will wick straight up the body of the hair fibers. Instead of a clean, sharp point, your spike turns into a hard, thick plastic stick that glues neighboring lashes together into a messy cluster of stickies. Keep your adhesive drops completely fresh and clean to avoid this chemical drag.
Another common blunder is neglecting your placement angles. When you are rushing through a busy day, it is easy to let your hand alignment drift, causing your spikes to point in random directions. A spike that leans sideways or twists inward looks like a mistake the second the client opens their eyes. You have to lock your tweezers at a strict ninety-degree angle to the eyelid skin, forcing every single texture point to stand completely upright and true to your original blueprint.
How to Customize Wispy Texture for Different Eye Shapes
You cannot just copy-paste a single wispy map onto every face that walks into your suite. What looks incredible on a wide-open almond eye can look completely chaotic or invisible on a hooded lid.
For hooded or deep-set eyes, your spikes need to be significantly longer than usual—sometimes up to three or four millimeters past the background—just to clear that heavy brow fold. If your contrast is too tight, the skin fold will swallow your peaks whole, leaving the set looking totally basic and flat.
If you are styling downturned or sleepy eyes, keep your ultra-long spikes strictly away from the outer corners. Placing heavy texture on the very last few lashes will drag the eye silhouette down toward the cheekbone, making the client look tired. Instead, cluster your longest spikes right under the arch of the eyebrow to pull the whole face upward for an instant, eye-opening lift.
Trending Wispy Lash Styles in 2026
The undisputed king of the modern scene is the ultra-textured, wispy hybrid lashes style. It blends the clean, sharp definition of classic isolation with the soft, full coverage of volume fans, making it the top request for clients who want drama that still looks wearable for their daily routine.
We are also seeing a massive surge in strip-lash replication maps. Clients are constantly bringing in screenshots of cheap strip lashes from social media and asking their technicians to recreate that exact staggered, jagged layout using semi-permanent extensions. It requires an insane amount of layering discipline and precise length jumping, but when you pull it off, the results look absolutely iconic.
Ditch the Basics
Stepping away from uniform maps is how you separate yourself from the rest. Mastering the layers of the eyelid lets you manipulate shadows, fix natural asymmetry, and deliver that custom, piecey drama that keeps your books completely full. Stop playing it safe with flat top lines. Treat your workstation like a design lab, mix up your lengths with absolute intention, and start putting out textured volume lashes that look completely unmatched.


Dejar un comentario
Este sitio está protegido por hCaptcha y se aplican la Política de privacidad de hCaptcha y los Términos del servicio.