

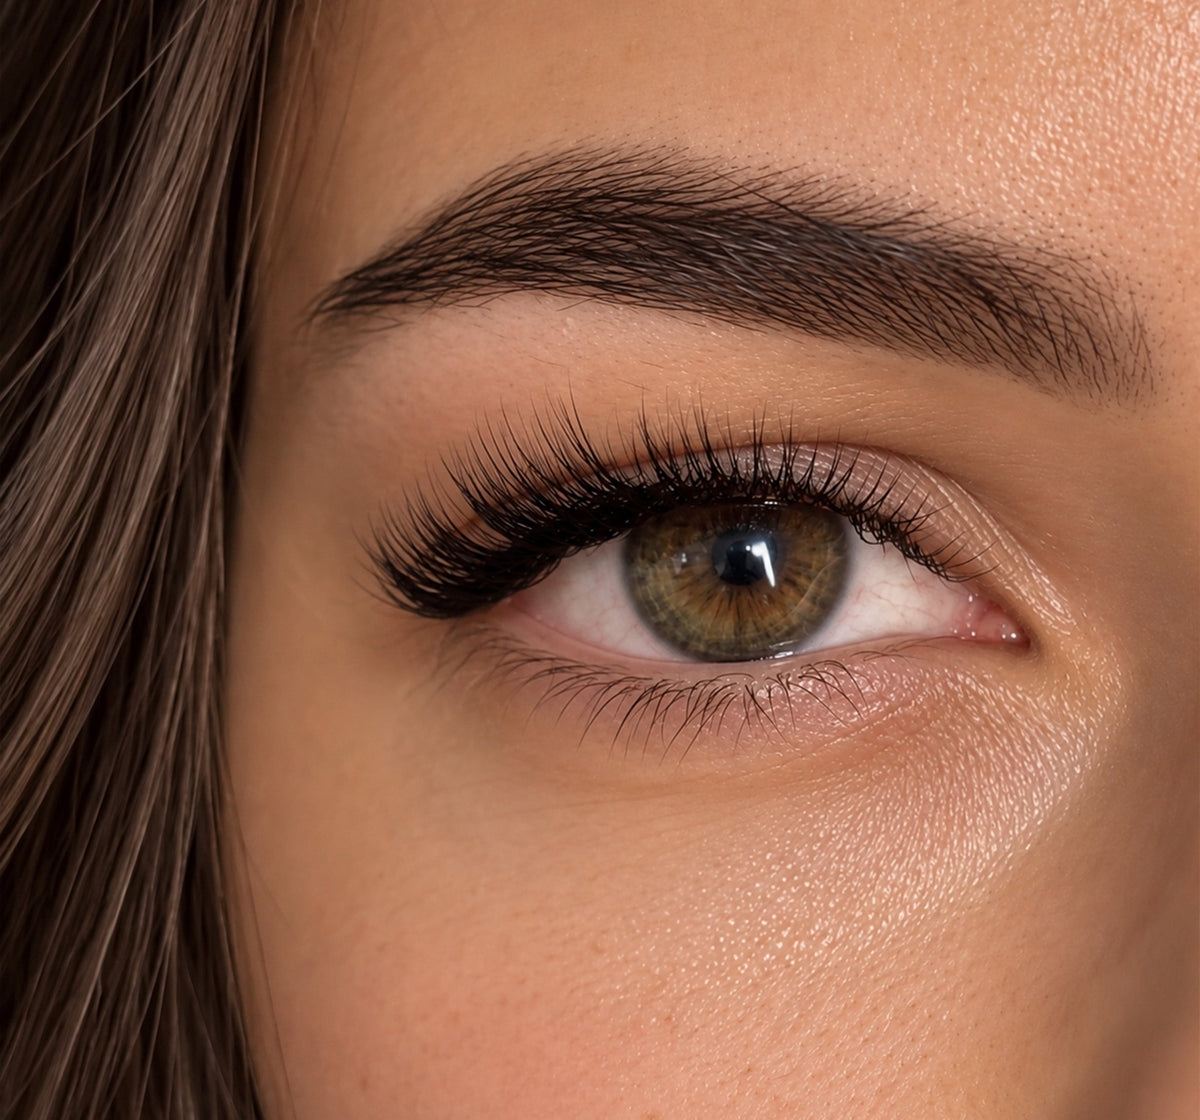
Best Eyelash Extensions for Hooded Eyes: A Complete Lash Mapping Guide
Hooded eyes have a reputation for being “difficult” to lash. But don’t you think that’s a little unfair? They aren’t difficult, just have their own rules.
The lid folds over part of the eye, the brow bone can sit closer to the lash line, and suddenly that gorgeous curl you were planning can disappear into the fold like it owes somebody money. And it sounds scary especially when you realise you have to control where the lashes will live once the eye is open. Because a set can look absolutely stunning with the client’s eyes closed and then half the design has vanished. A swing and a miss.
The good news are once you understand how hooded eyes interact with curl, length, direction, and mapping, you can create sets with zero worries.
What Makes Hooded Eyes Different for Lash Application
First things first: hooded eyes differ in a big way. Some clients have a subtle fold that slightly covers the crease. Others have a heavier lid that sits much closer to the lash line. Some have hooding mainly toward the inner or outer corners. And, because faces apparently enjoy keeping lash artists humble, a client can have hooded eyes and another dominant eye shape at the same time.
You might be working with hooded almond eyes. Hooded round eyes. Hooded small eyes. You can even have hooding combined with a monolid structure.
So before reaching for your favorite curl, actually look at the eye. Where does the lid sit when the client is relaxed? How much of the natural lash line is visible? Where does the lash disappear when the eye opens?
And perhaps most importantly: where do you want the extensions to be visible? That last question changes everything.
With hooded eyes, extensions that follow the natural direction too closely can get swallowed by the lid. A beautiful curl may technically be there, but if you can barely see it from the front, what’s the point? This is where lash styling becomes less “pick a map from the menu” and more custom architecture.
The goal usually is to create visible lift and openness while respecting the natural lashes and the client’s eye structure.
Best Curl Types for Hooded Eyes (and Why)
Let’s talk curls. This is where things get spicy because there is no universal choice. A curl that works beautifully on one client may be completely wrong for another. Natural lash direction, lid weight, brow bone, lash length, and the amount of visible lid space all matter.
That said, stronger lifting curls are often useful when you need the extensions to clear the hood and remain visible.
L Curl and L+ Curl
These are especially interesting for clients whose natural lashes point downward or whose lid tends to hide a more traditional curl. The straighter base combined with the dramatic lift can help create that clean, upward direction without putting all the drama at the base.
M Curl
M curl can also be a fantastic option when you want lift with a more directional, elongated effect. It can help create that “eyes are going somewhere” feeling rather than simply making the lashes look rounder.
C and CC Curls
Don’t kick C and CC curls out of the group chat just because we’re talking about hooded eyes. They can absolutely work.
The key is understanding the client's natural lashes and lid space. A CC curl may give you enough lift to keep the extensions visible, while a softer C can work beautifully in areas where the natural lash direction already provides plenty of lift.
The mistake is treating curl selection like a personality quiz. Look at the actual lashes. The eye gets the final vote.
Mapping Length and Volume to Open Up the Eye
Now we get to the fun part: the map. When you're creating eyelash extensions for hooded eyes, your map should have a purpose beyond “longer in the middle because that's what I always do.”
Start by asking what you're trying to visually change. Want more openness? More lift? More elongation? Less heaviness around the lid?
Your answer should influence the map. For many hooded clients, keeping excessive length away from areas where the lid already feels heavy can help prevent the set from visually dragging the eye down. You don't necessarily need gigantic lengths to create a dramatic effect. A slightly shorter, well-positioned lash can create more visible impact than a longer extension that disappears into the lid.
Open-Eye Mapping
If the goal is to make the eyes appear more open, a carefully placed increase in length through the central area can work beautifully. But, don't automatically build a giant doll-eye spike right in the center.
If the client has hooded, round eyes, for example, pushing too much length directly into the middle can make the eye look even rounder or heavier. This is where knowing the difference between eyelash extensions for hooded eyes, eyelash extensions for almond eyes, and eyelash extensions for round eyes really matters.
The hood tells you how much of the design may disappear. The underlying eye shape tells you where you should create your visual emphasis.
The “Open the Eye” Trap
There’s a temptation to think: Hooded eyes = add more length = more open.
Not necessarily. More length can actually create more visual weight. And if that weight sits exactly where the lid is already heavy? Congratulations. You may have accidentally built a tiny curtain over the eye. The better approach is to think in terms of lift, visibility, and balance.
Use curl to create elevation. Use length strategically. Use density where it supports the shape rather than burying it. And keep checking the design with the client's eyes open. Because the open-eye view is the final boss.
Common Mapping Mistakes on Hooded Eyes
Mistake #1: Mapping With the Eyes Closed and Never Checking Again
This one is classic. The set looks gorgeous while the client is lying there. Then she sits up. And suddenly the longest lashes are hiding under the lid like they're on witness protection. Always check how your work looks with the eyes open.
Mistake #2: Going Longer Just Because the Lid Is Hooded
Hooded eyes don't automatically need extra-long extensions. In fact, excessive length can add weight and make the eye look smaller. The natural lashes still have to carry those extensions, and the final design still has to make visual sense. Longer isn't automatically more dramatic. Sometimes it's just… longer.
Mistake #3: Using the Same Map You Use on Everyone
Your signature map is not a sacred text. If you use the same design on every client, eventually someone's eye shape is going to humble you. A map that looks fantastic on almond eyes may not give you the same result on round eyes. A design that beautifully elongates a roundd eye can behave very differently on a hooded eye. And what works for one client with small eyes may overwhelm another.
Mistake #4: Ignoring Natural Lash Direction
Curl doesn't exist in a vacuum. If the natural lashes grow downward, straight, or in different directions across the lash line, your extension choice needs to account for that. Otherwise, you can have technically beautiful lashes fighting the natural lash direction the entire appointment.
Mistake #5: Going Heavy With Volume
Volume can look incredible on hooded eyes. But volume doesn't mean maximum density everywhere. If the lid is already visually heavy, adding a dense wall of lashes across the entire lash line can make the eyes look smaller rather than more open.
Styles to Avoid for This Eye Shape
Again, there are no universal forbidden maps. But there are certain choices that can be tricky depending on the client's exact anatomy. Extremely long lashes sitting directly under a heavy fold can disappear or create visual heaviness.
Very dense volume across the entire eye can overwhelm a small or heavily hooded eye.
A dramatic downward outer-corner progression can also make the eye appear heavier or more tired when the goal is actually to lift it.
And overly dramatic central length isn't always the answer either, particularly when the client already has naturally round eyes.
Basically, don't confuse more lash with more effect. A beautifully designed set doesn't scream because it has the most fibers in the room. It hits the right notes.
The Real Secret to Hooded-Eye Lash Mapping
There isn't one magic map hiding in the lash universe. There's the right map for this face, these lashes, and this desired result.
If you're building your kit for customized mapping, keep a range of curls, diameters, and lengths on hand rather than trying to force every client into the same formula.
Because when the eye changes, your strategy should be allowed to change with it. And one last thing: Don't be scared of hooded eyes. They're not a problem you need to “fix.” They're a canvas with a little more attitude.
FAQ
Q: What curl works best for hooded eyes?
A: There isn't one curl that works for every hooded eye. L, L+, M, CC, and other curls can all be useful depending on natural lash direction, lid structure, brow bone, and the effect you're creating. Stronger lifting curls can be particularly helpful when you need the extensions to remain visible above the hood.
Q: Should lashes be shorter or longer on hooded eyes?
A: Not automatically shorter or longer. The better question is where the length is placed and whether it remains visible when the eyes are open. Excessive length can add weight, while strategic lengths and curls can create a more lifted and open appearance.
Q: Can volume lashes make hooded eyes look smaller?
A: They can, if the density and placement create too much visual weight. Volume itself isn't the problem. A well-balanced volume set can look gorgeous on hooded eyes, but overly dense or heavy mapping may make a smaller or heavily hooded eye appear more closed.




Leave a comment
This site is protected by hCaptcha and the hCaptcha Privacy Policy and Terms of Service apply.