

Article: Lash Lift on Short Lashes (and Other Tricky Cases): Too Curly, Uneven, or Frizzy Results
Lash Lift on Short Lashes (and Other Tricky Cases): Too Curly, Uneven, or Frizzy Results
The trickiest lash lifts are rarely the ones where everything goes spectacularly wrong. Sometimes, it’s just one little detail: a shield that’s too small, a few lashes that refuse to cooperate, or processing time that goes a smidge too far. And suddenly, instead of that soft, pretty curl your client asked for, you’re staring at lashes that look like Carrie at that famous school ball.
Here’s an insight: you can create a beautiful result no matter what lashes you’re working with. You need the right shield, a good understanding of lash science, and a healthy respect for processing times.
Lash Lift on Short Lashes
Owners of short lashes are not sentenced to walk lift-deprived. It’s just that short lashes leave you less room for error. But we must make all our girlies pretty, and a real pro won’t say no to a client, even if they see a challenge.
When the natural lashes are short, fine, or growing in different directions, every little decision matters that much more. Before you reach for your lifting lotion, you need a strategy:
-
Measure natural lash length. Short lashes need a shield that creates a flattering lift without forcing the tips into an exaggerated curl.
-
Assess lash thickness: Fine lashes generally process faster.
-
Determine growth direction: Different lashes may need different placement strategies.
-
Natural lash health matters: Brittle, damaged, or previously over-processed lashes aren't the place to experiment. Sometimes the best professional move is to postpone the treatment.
And please, don't write short lashes off before you've even started. A well-executed lift can open up the eyes beautifully, even when the natural lashes aren't particularly long.
Choosing Shields for Short Lashes
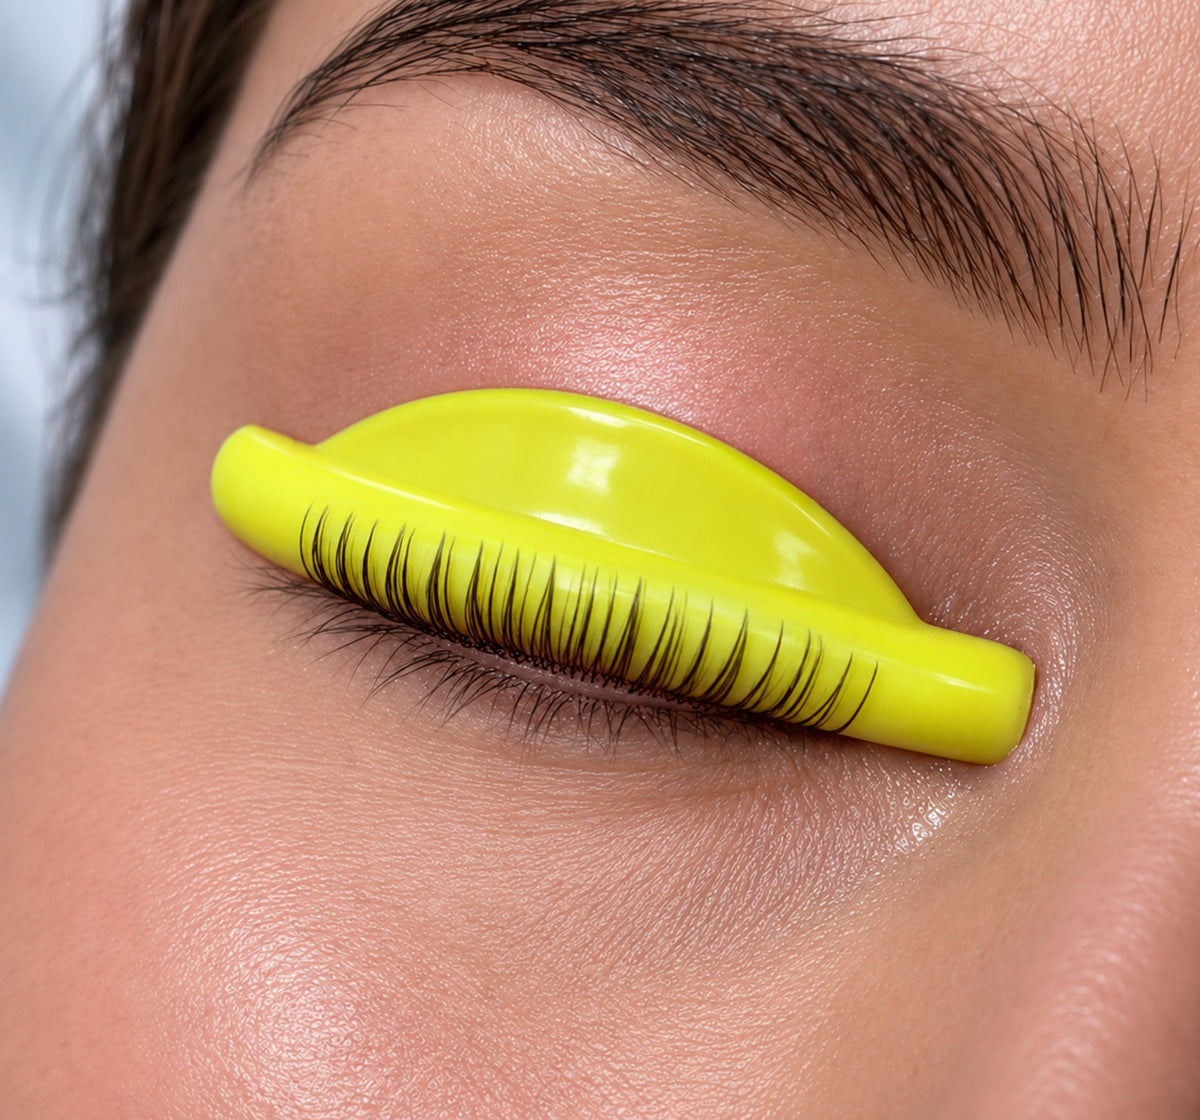
As a general rule, smaller shields create a tighter, more dramatic curl, while larger shields tend to create a softer, more elongated lift. But the actual result also depends on the shield's shape, the client's lash length, and how the lashes sit against its surface.
Small shields
Best considered for very short lashes when the shield design allows the lashes to be positioned correctly. Can create a more pronounced curl. Be careful: if the shield is too small for the natural lash length, the result can look sharply bent or overly curled.
Medium shields
A useful starting point for short-to-medium lashes, depending on the shield's shape. Can balance visible lift with a softer curl. Check that the natural lashes fit the shield properly instead of simply defaulting to a size labeled M.
Large shields
Worth considering for longer lashes or a softer, more elongated result. They may be unsuitable for very short lashes if the lashes can't reach and lie correctly along the shield. A shield that's too large can leave the lift looking subtle or underdeveloped.
The golden rule: choose based on the actual fit, not the size label.
Position the shield close enough to the lash line for controlled lifting, without touching the waterline or irritating the skin. The lashes should lie smoothly against the shield, with their tips reaching the appropriate area for the intended result. If they barely reach the shield's curve, or the tips fold over themselves, reassess your choice.
Adjusting Processing Time for Short and Fine Lashes
Processing time depends on the natural lash thickness and condition, and the manufacturer's directions. Short lashes aren't automatically fine lashes, either.
|
Natural lash type |
What to consider |
Professional approach |
|
Short and fine |
More delicate fibers may process quickly |
Avoid extending time to chase extra curl |
|
Short and medium-thickness |
Short length affects shield fit, but not necessarily processing speed |
Choose a suitable shield and use the prescribed timing |
|
Short and coarse |
May be more resistant to reshaping |
Don't automatically assume short means fast processing |
|
Short and damaged |
Reduced elasticity or signs of previous chemical damage |
Postpone treatment if lash integrity is compromised |
A few things to keep in mind:
-
Follow the specific product instructions.
-
Don't add extra time just because the curl looks subtle early on.
-
Don't assume every lash on the same eye will respond identically. Natural lashes vary in thickness, condition, and growth cycle.
-
Never exceed the manufacturer's maximum processing time. More time does not automatically mean a better lift.
You don’t have to squeeze every last degree of curl out of a short lash. Let’s aim for result that suits the natural lash without compromising its condition.
Lash Lift Too Curly
A lash lift that's too curly is one of those results that can make even an experienced artist cringe. The good news is that once you understand what causes excessive curl, it's easier to prevent it next time.
1. The shield was too small
When the shield is too small for the client's natural lash length and the desired result, the lashes can bend too sharply over its curve. Instead of a smooth, lifted shape, the tips may curl back toward the eyelid.
How to avoid it: assess the natural lash length and shield geometry before starting. If the lashes are already sitting at an extreme angle or the tips are folding over, don't force the fit.
2. The processing time was too long
Lifting solutions change the bonds within the hair structure so the lashes can be reshaped. Leave them on longer than the product instructions allow, and you risk pushing the lashes beyond the intended result. This is particularly concerning with fine, fragile, or previously treated lashes.
How to avoid it: follow the manufacturer's timings for the particular formulation and lash type. Don't add extra minutes to compensate for poor shield selection or placement.
3. The lashes weren't positioned correctly
Even a suitable shield can produce an exaggerated result if the lashes are stretched, folded, or placed unevenly across its surface.
Look out for tips that cross over, overlap, or curl backward. Those are signs that the placement needs attention before processing begins.
4. The desired result wasn't matched to the shield
Your client might bring in a photo of a soft, elongated lift, while the shield you've selected is designed to produce a much tighter curl. Neither result is necessarily bad in itself. They're just not the same look.
Before you begin, agree on the desired finish and choose the shield accordingly. The aim is to match the tool to the goal, not to hope the chemistry will magically sort everything out.
Lash Lift Uneven
One eye looks lifted and fluttery. The other looks like it missed the memo. An uneven lash lift can happen even when you've done many successful treatments. Natural lashes don't grow in perfectly uniform rows, and the two eyes may differ in length, density, direction, or responsiveness.Still, if one side looks noticeably different from the other, there are a few things worth checking.
Different shield sizes or positioning
Using different shields on each eye isn't automatically wrong. Sometimes asymmetry in natural lash length or eye shape makes adjustments necessary. The problem is choosing them without a clear reason, or placing the same shield differently on each eye.
Compare both sides before applying the lifting products. Check the distance from the lash line, the direction of the lashes, and how the tips sit against the shield.
Uneven application of the lifting products
If one section receives more product than another, or some lashes aren't adequately covered, the result may vary across the lash line. Ensure lashes receive consistent coverage without flooding the roots. Don't compensate for patchy application by leaving everything on longer. That can over-process the areas that are already responding well.
Adhesive issues
If lashes lift away from the shield, cross over, or shift during processing, the final result may look messy or uneven. Work in manageable sections, separate the lashes carefully, and make sure they're sitting in the intended direction before applying the next product.
Natural lash differences
Sometimes, one eye simply has shorter lashes, a different growth pattern, or more resistant fibers. That's why comparing the two eyes before the treatment matters. You may need to adjust shield selection or follow the manufacturer's guidance for each lash type, rather than assuming both sides will behave identically.
Pro tip: take a quick look at both eyes from the front and side before you start. A few seconds of assessment can save you from discovering an obvious mismatch after the treatment is complete.
Frizzy or Crimped Lashes After a Lift
Frizzy lashes after a lash lift are not the fluffy, carefree kind of texture we'd put on a mood board. We're talking about lashes that look kinked, rough, crisscrossed, or oddly bent instead of smooth and defined. This can happen when the natural lashes have been over-processed, stretched too aggressively, positioned poorly, or subjected to repeated chemical treatments before they've recovered.
What causes frizzy or crimped lashes?
- Over-processing.
- Poor placement.
- Excessive tension.
- Repeated treatments too close together.
- Compromised natural lashes.
Can you brush out frizzy lashes?
A clean spoolie can help separate lashes that are merely tangled, but brushing won't repair chemically damaged fibers or reverse an overly tight curl. If the lashes are visibly crimped or their texture has changed, don't keep brushing, pulling, or applying more products in an attempt to force them straight.
Instead, assess their condition and recommend gentle aftercare. If the lashes appear significantly damaged, stop further chemical treatments and allow them to grow out.
How to Fix an Over-Processed Lash Lift
A disappointing lash lift doesn't mean you need to launch into emergency beauty-salon mode. But it does mean you need to put the chemicals down for a moment and assess the situation honestly.
When a client has a lash lift that's too curly, uneven, or frizzy, the safest correction depends on what's actually wrong. A slightly uneven result on healthy lashes is a very different situation from lashes that have become brittle after over-processing.
Step 1: Assess the natural lashes
Look for signs of damage, including:
-
Unusual brittleness or rough texture
-
Lashes that bend sharply or kink at the tips
-
Noticeable breakage or shedding
-
Lashes that appear weak, stretched, or unusually fragile
If you suspect significant over-processing, don't immediately attempt another chemical treatment. Further processing can worsen the damage.
Step 2: Identify the type of problem
|
Issue |
Possible cause |
Next Step |
|
Curl is tighter than expected, but lashes look healthy |
Too long processing, wrong shield size |
Assess the lash condition |
|
One eye is more lifted than the other |
Different positioning, product coverage, or natural lash patterns |
Identify the cause; avoid automatically reprocessing the entire lash line |
|
Lashes look crossed or messy |
Placement issues or movement during processing |
Separate gently if possible; don't pull or force the lashes into position |
|
Lashes look frizzy, brittle, or crimped |
Possible over-processing or structural damage |
Stop chemical correction and prioritize recovery and growth |
|
Lift appears weak or inconsistent |
Shield fit, application, or processing issues |
Don't immediately repeat the treatment; first assess lash condition and product instructions |
Step 3: Know when not to correct chemically
This is where professional judgment matters more than the desire to fix a result immediately. Never assume you can safely apply a reducing lotion again just because another brand's instructions describe a correction method.
If the lashes are brittle, frizzy, or visibly damaged, do not attempt another chemical lift simply to make them look straighter. Refer to the manufacturer's correction guidance and seek appropriate professional advice if you're uncertain about the lash condition.
Step 4: Focus on gentle aftercare
Once the treatment is complete, your client shouldn’t forget their aftercare duties:
-
Avoid unnecessary pulling, rubbing, or repeated brushing.
-
Follow the aftercare recommendations.
-
Use only products suitable for the eye area and compatible with the lashes' condition.
-
Avoid further chemical processing.
Step 5: Give the lashes time
So, how long should you wait before attempting another lift? A commonly used interval between routine lash lifts is around six to eight weeks. But if the lashes remain brittle or damaged, postpone treatment further.
FAQ: Tricky Lash Lift Cases
Q: How soon can you redo a lash lift?
A: For routine treatments, many lash artists allow around six to eight weeks between lifts, following the specific manufacturer's instructions.
However, if the previous lift was too curly or the lashes are frizzy, brittle, or damaged, you may need to wait longer. Don't schedule a repeat treatment based on the calendar alone.
Q: Can you lift lashes after extensions?
A: It depends on the condition of the natural lashes and the products involved, but performing a lift directly over existing extensions is generally not recommended.
Q: Why is one eye more lifted than the other?
A: Differences in natural lash length, growth direction, shield placement, adhesive application, or processing can all contribute. Compare both eyes before the service, make sure the shields fit properly, and apply products consistently according to the manufacturer's directions.
Q: Can you fix a lash lift that's too curly?
A: Possibly, but it depends on the condition of the lashes. If the lashes are frizzy, brittle, or visibly damaged, avoid further processing and allow them to recover and grow out.
Q: Do short lashes need less processing time?
A: Not necessarily. Lash length and lash thickness are different characteristics.
Work With the Lashes You've Got
Short lashes aren't a lost cause. Uneven lashes aren't automatically a sign that you've done something wrong. And a lift that doesn't turn out quite as planned doesn't mean you need to throw your entire technique out the window.
What matters is learning to read the natural lashes in front of you.
Choose shields based on fit and the result you want to create. Follow the correct processing instructions. Pay attention to placement. And when the lashes show signs of over-processing, resist the temptation to fix one chemical treatment with another. That's the kind of work that keeps clients coming back.




Leave a comment
This site is protected by hCaptcha and the hCaptcha Privacy Policy and Terms of Service apply.