

How to Store Lash Extensions Properly
If your lash supplies are currently living in five different drawers, three random boxes, and one suspicious little pile next to your tweezers, welcome to the club. Lash organization can get messy fast. One minute you have a beautifully arranged collection of lash trays; the next, you’re hunting for a specific 0.07 D curl like Indiana Jones looking for the Holy Grail.
But understanding how to store lash extensions properly is more than an organization issue. The way you store your lashes can affect their appearance, usability, and the overall efficiency of your work. Dust, humidity, heat, sunlight, and careless handling can all turn perfectly good lash extensions into a poor quality waste.
The good news you don't need to bend over backwards by creating an insane genius worthy storage system. You just need to protect your lash trays, as your work kinda depends on them.
Why Proper Storage Matters
Professional lash extensions are delicate. They're designed to hold a particular curl, thickness, shape, and finish. Additionally, your tweezers, adhesive, lashes, pads, tape, and other supplies all need to be ready to perform when your client arrives.
If your storage system is chaotic, your appointment can start feeling like a scavenger hunt. Proper lash extension storage helps protect three important things: cleanliness, shape, and usability.
Prevent Dust and Debris
Dust is basically that clingy friend that shows up everywhere uninvited. When eyelash extension trays are left open, dust and tiny particles can settle onto the lashes or adhesive strips. You might not notice a problem immediately, but working with contaminated or dirty materials isn't something to shrug off.
Keeping trays closed when you're not using them is a simple way to reduce unnecessary exposure. Your lashes don't need to sit out on display like museum artifacts.
Maintain the Curl
One of the biggest reasons to store lashes properly is to help preserve their original shape. Extensions are manufactured to have a specific curve. If trays are bent, crushed, stored under heavy objects, or repeatedly handled carelessly, the strips and lashes can become harder to work with.
Protect Adhesive Strips
Most lash trays use adhesive strips to keep individual lashes secured in place. These strips need to remain functional so you can pick up lashes smoothly during application.
If trays are exposed to excessive moisture, heat, dust, or other unfavorable conditions, the adhesive strip can become less convenient to work with. Lashes may shift, become difficult to pick up, or lose their neat arrangement.
For a busy lash artist, that's more than a minor annoyance. Those tiny interruptions add up over the course of a full day.
Ideal Temperature and Humidity
When it comes to storing eyelash extensions, think cool, dry, shaded, and stable. You don't need to turn your lash room into a laboratory. In fact, extreme conditions are usually what you want to avoid. A stable indoor environment is generally a much better bet than constantly moving your lash supplies around.
Heat
Excessive heat isn't your lash collection's BFF. Avoid storing trays near radiators, heaters, heating vents, hot equipment, or areas that become unusually warm throughout the day. Heat can affect the materials used in lash trays and may also make adhesive strips behave differently.
If one part of your salon feels like Palm Springs in July while another feels like a walk-in freezer, don't store your lashes in either extreme. A consistent room environment is the safer play.
Moisture
Humidity is another factor worth paying attention to. Lashes themselves don't need to be stored in a damp environment. Excess moisture can affect packaging, adhesive strips, and the general condition of your supplies. That means your bathroom is probably not the place for your lash inventory, even if that cabinet happens to have the perfect amount of storage space.
For professional lash storage, choose a clean, dry area away from sinks, showers, humidifiers, and other direct sources of moisture.
Sunlight Exposure
Direct sunlight is another sneaky problem. Leaving lash trays on a windowsill might look cute for approximately five minutes, but UV exposure and heat aren't doing your supplies any favors.
Strong sunlight can heat up the packaging and may affect the appearance or condition of materials over time.
Your lash collection doesn't need its own tanning session. Keep trays away from direct sunlight and preferably inside a drawer, cabinet, or covered organizer.
Best Storage Solutions
Now for the fun part: where should all these lashes actually go? The answer depends on how many trays you have and how you work. A beginner with ten trays doesn't need the same setup as an artist with enough inventory to open a small lash boutique.
Original Trays
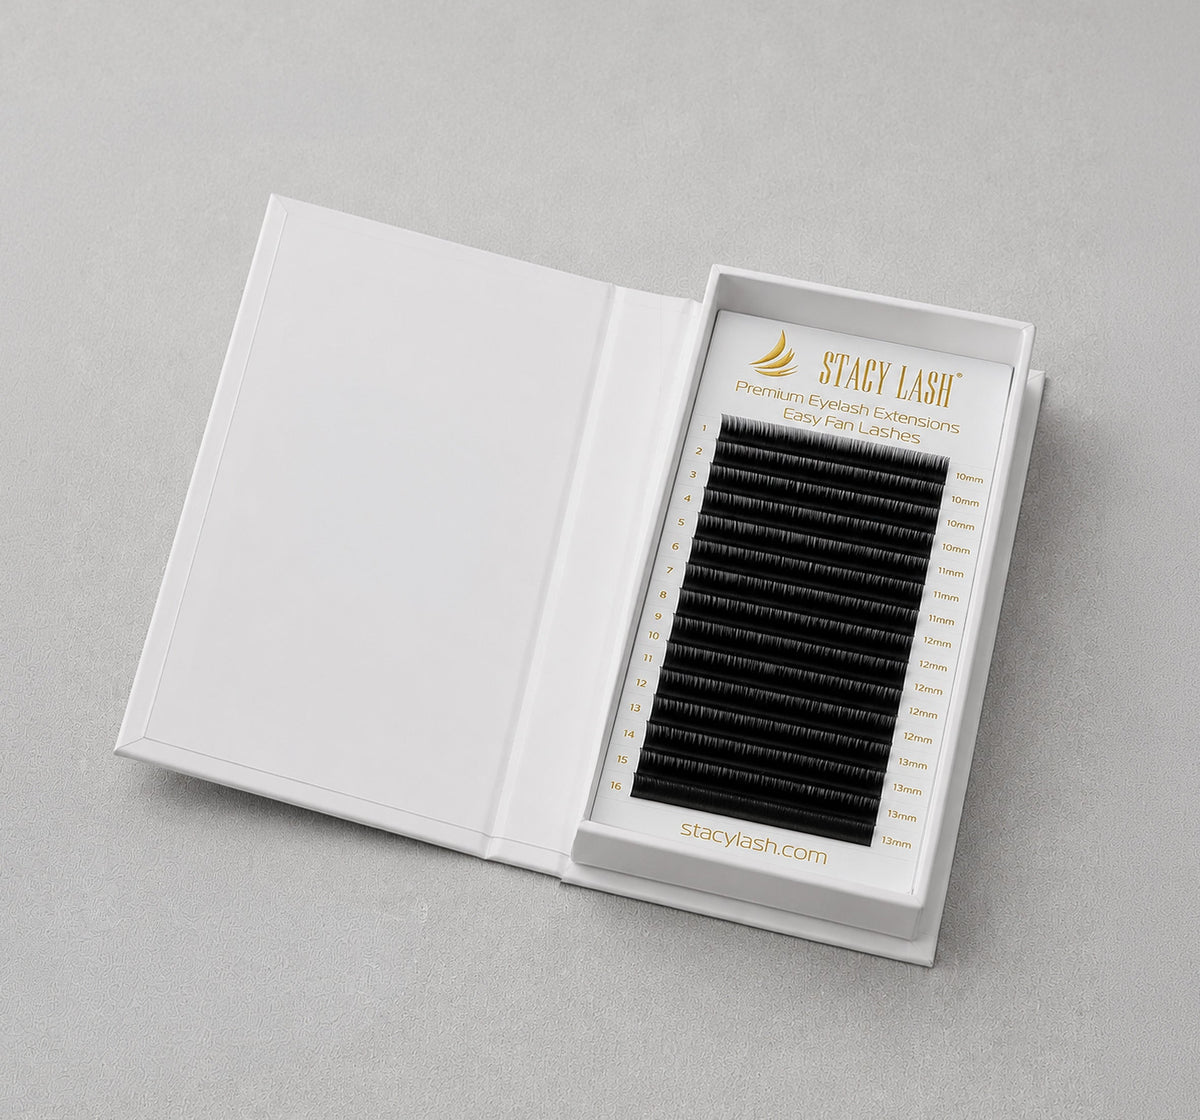
The original packaging is often the easiest and most practical storage option. Keeping lashes in their original lash trays means the curl, length, and diameter information usually stays visible. That's a huge advantage when you're working quickly.
If you have several trays that look almost identical, those labels can save you from accidentally grabbing a 0.10 when you meant to reach for a 0.07. Original packaging also keeps lashes protected when they're not being used.
Acrylic Organizers
Acrylic organizers are great for artists who want their supplies visible and easy to access. You can arrange trays vertically or horizontally depending on the organizer and your workspace. Clear storage also makes it much easier to see what you actually have before ordering another tray.
Because nothing hurts quite like realizing you just bought your fourth tray of a curl you already had hiding in the back of a drawer. For larger collections, consider organizing acrylic storage by curl first, then diameter and length.
Dust-Proof Containers
If your workspace gets dusty or your lash supplies aren't used every day, covered containers can provide an additional layer of protection. The important thing is accessibility. A storage system that technically protects your lashes but takes three minutes to open every time isn't going to survive a busy Saturday.
The best system is one that protects your supplies without getting in your way.
Common Storage Mistakes
Sometimes the biggest problems come from tiny habits. You know the drill: "I'll put it away properly later." Later becomes tomorrow. Tomorrow becomes next Tuesday. Suddenly your lash tray is sitting open under a ring light like it pays rent. Here are some common mistakes worth avoiding.
Leaving Trays Open
Keeping trays open exposes them to dust and accidental contact. Close trays after use and return them to their designated storage location. It takes seconds and keeps your workspace cleaner.
Mixing Curls
Never throw different curls into one unlabeled container just because you're in a hurry. Curls can look deceptively similar, particularly when you're working quickly. Keeping each curl separated makes inventory management and application much easier.
Mixing Diameters
The same rule applies to diameter. A tray containing multiple diameters might sound convenient, but if the lashes aren't clearly separated and labeled, you're creating unnecessary opportunities for mistakes. Keep diameters organized so you can immediately identify what you're reaching for.
Leaving Trays in Direct Sunlight
We already covered this, but it's worth repeating because it's such an easy mistake. A sunny windowsill may be convenient. It is not ideal lash extension storage. Store trays somewhere shaded and protected from direct sunlight instead.
Organizing Lash Extensions Efficiently
Here's where good storage becomes great storage. The goal isn't simply to make everything look neat. The goal is to create a system that lets you find what you need without thinking too hard about it.
When you're in the middle of a full set, your brain should be focused on mapping, isolation, placement, symmetry, and styling, not "Where the heck did I put my CC curl?"
Organize by Curl
Start with curl. Keep C curls together, CC curls together, D curls together, L curls together, and so on. If you use specialty curls frequently, giving them their own section can make a world of
difference. Think of it like a record collection: you wouldn't throw every album into one giant pile and expect to find the right one in two seconds.
Organize by Diameter
Once curls are separated, arrange your trays by diameter. For example, you might group:
● 0.03
● 0.05
● 0.06
● 0.07
● 0.10
● 0.12
● 0.15
The exact diameters in your collection will depend on your techniques and the styles you offer. This system becomes especially useful if you frequently switch between classic, hybrid, and volume work.
Organize by Length
Length is another easy way to make your inventory more functional. You could arrange trays from shorter to longer, for example, 6 mm through 15 mm, or separate everyday lengths from specialty lengths.
That way, when you need a shorter inner-corner lash or a longer styling piece, you know exactly where to look.
Color Coding
Color coding can take your organization to the next level. For example, you might use labels or colored stickers to distinguish:
● Different curls
● Different diameters
● Colored lashes
● Specialty lashes
● Frequently used trays
● New inventory
Just make sure your color system is consistent. There is no point creating a beautiful color-coded system if six months later you can't remember what the colors mean. Keep the legend simple. Or, better yet, write the category directly on the label.
Create a Storage System That Matches Your Workflow
There is no single "correct" lash storage setup. An artist who sees four clients a week has completely different storage needs from someone who is booked solid every day. Your system should fit your workflow.
If you mostly perform classic sets, you may want your classic lash trays front and center. If volume is your bread and butter, make those diameters and curls the easiest to reach. Think about the lashes you use most often. Those should be within arm's reach. Less frequently used specialty trays can live farther back or in a separate cabinet.
It's the same principle professional chefs use in a kitchen: the tools and ingredients used constantly stay close, while the obscure stuff can hang out in the back.
Label Everything You Can
If your lash collection is growing, labels are sanity insurance. At minimum, each storage section should make it easy to identify:
Curl + Diameter + Length For example: D | 0.07 | 11 mm
You can also add information such as brand, finish, or whether the tray is reserved for a specific technique. This becomes particularly helpful when several trays have nearly identical packaging. A good labeling system also makes inventory much easier. Instead of discovering you're out of a popular lash diameter five minutes before a client arrives, you'll know what needs restocking before it becomes an emergency.
Keep Your Lash Inventory Clean and Current
Storage isn't a "set it and forget it" situation. Every so often, take a few minutes to check your collection. Look for damaged packaging, trays that have been sitting unused for a long time, labels that are peeling off, and supplies that no longer fit your current workflow.
You don't need to become Marie Kondo with a tweezer in your hand, asking every lash tray whether it sparks joy. But you should know what you own.
A simple inventory check can prevent over-ordering, reduce clutter, and help you identify which products are actually earning their shelf space. If you're building or upgrading your lash collection, you can explore professional lash extensions and individual lashes designed for different lash styles and techniques.
Divide & Conquer
Proper lash extension storage doesn't have to be complicated. Keep your trays clean, dry, shaded, organized, and protected from unnecessary heat and moisture. Store curls, diameters, and lengths separately, label your inventory clearly, and make the lashes you use most often the easiest to grab.
The real goal is not having the prettiest storage cabinet on Instagram. It's having a setup that works so smoothly you barely notice it.
Because when your storage system is doing its job, you're not digging through drawers, squinting at mystery trays, or playing a guessing game with your 0.07 D curls. You're sitting down with your client, opening the right tray, and getting straight to the good stuff.
Good organization is one of those behind-the-scenes habits that makes professional lash work feel effortless. And when everything has its place, your whole appointment can run like a well-oiled machine.






Leave a comment
This site is protected by hCaptcha and the hCaptcha Privacy Policy and Terms of Service apply.