Correcting Overly Curled Natural Lashes Before Extension Application
Let’s Talk Curl Chaos
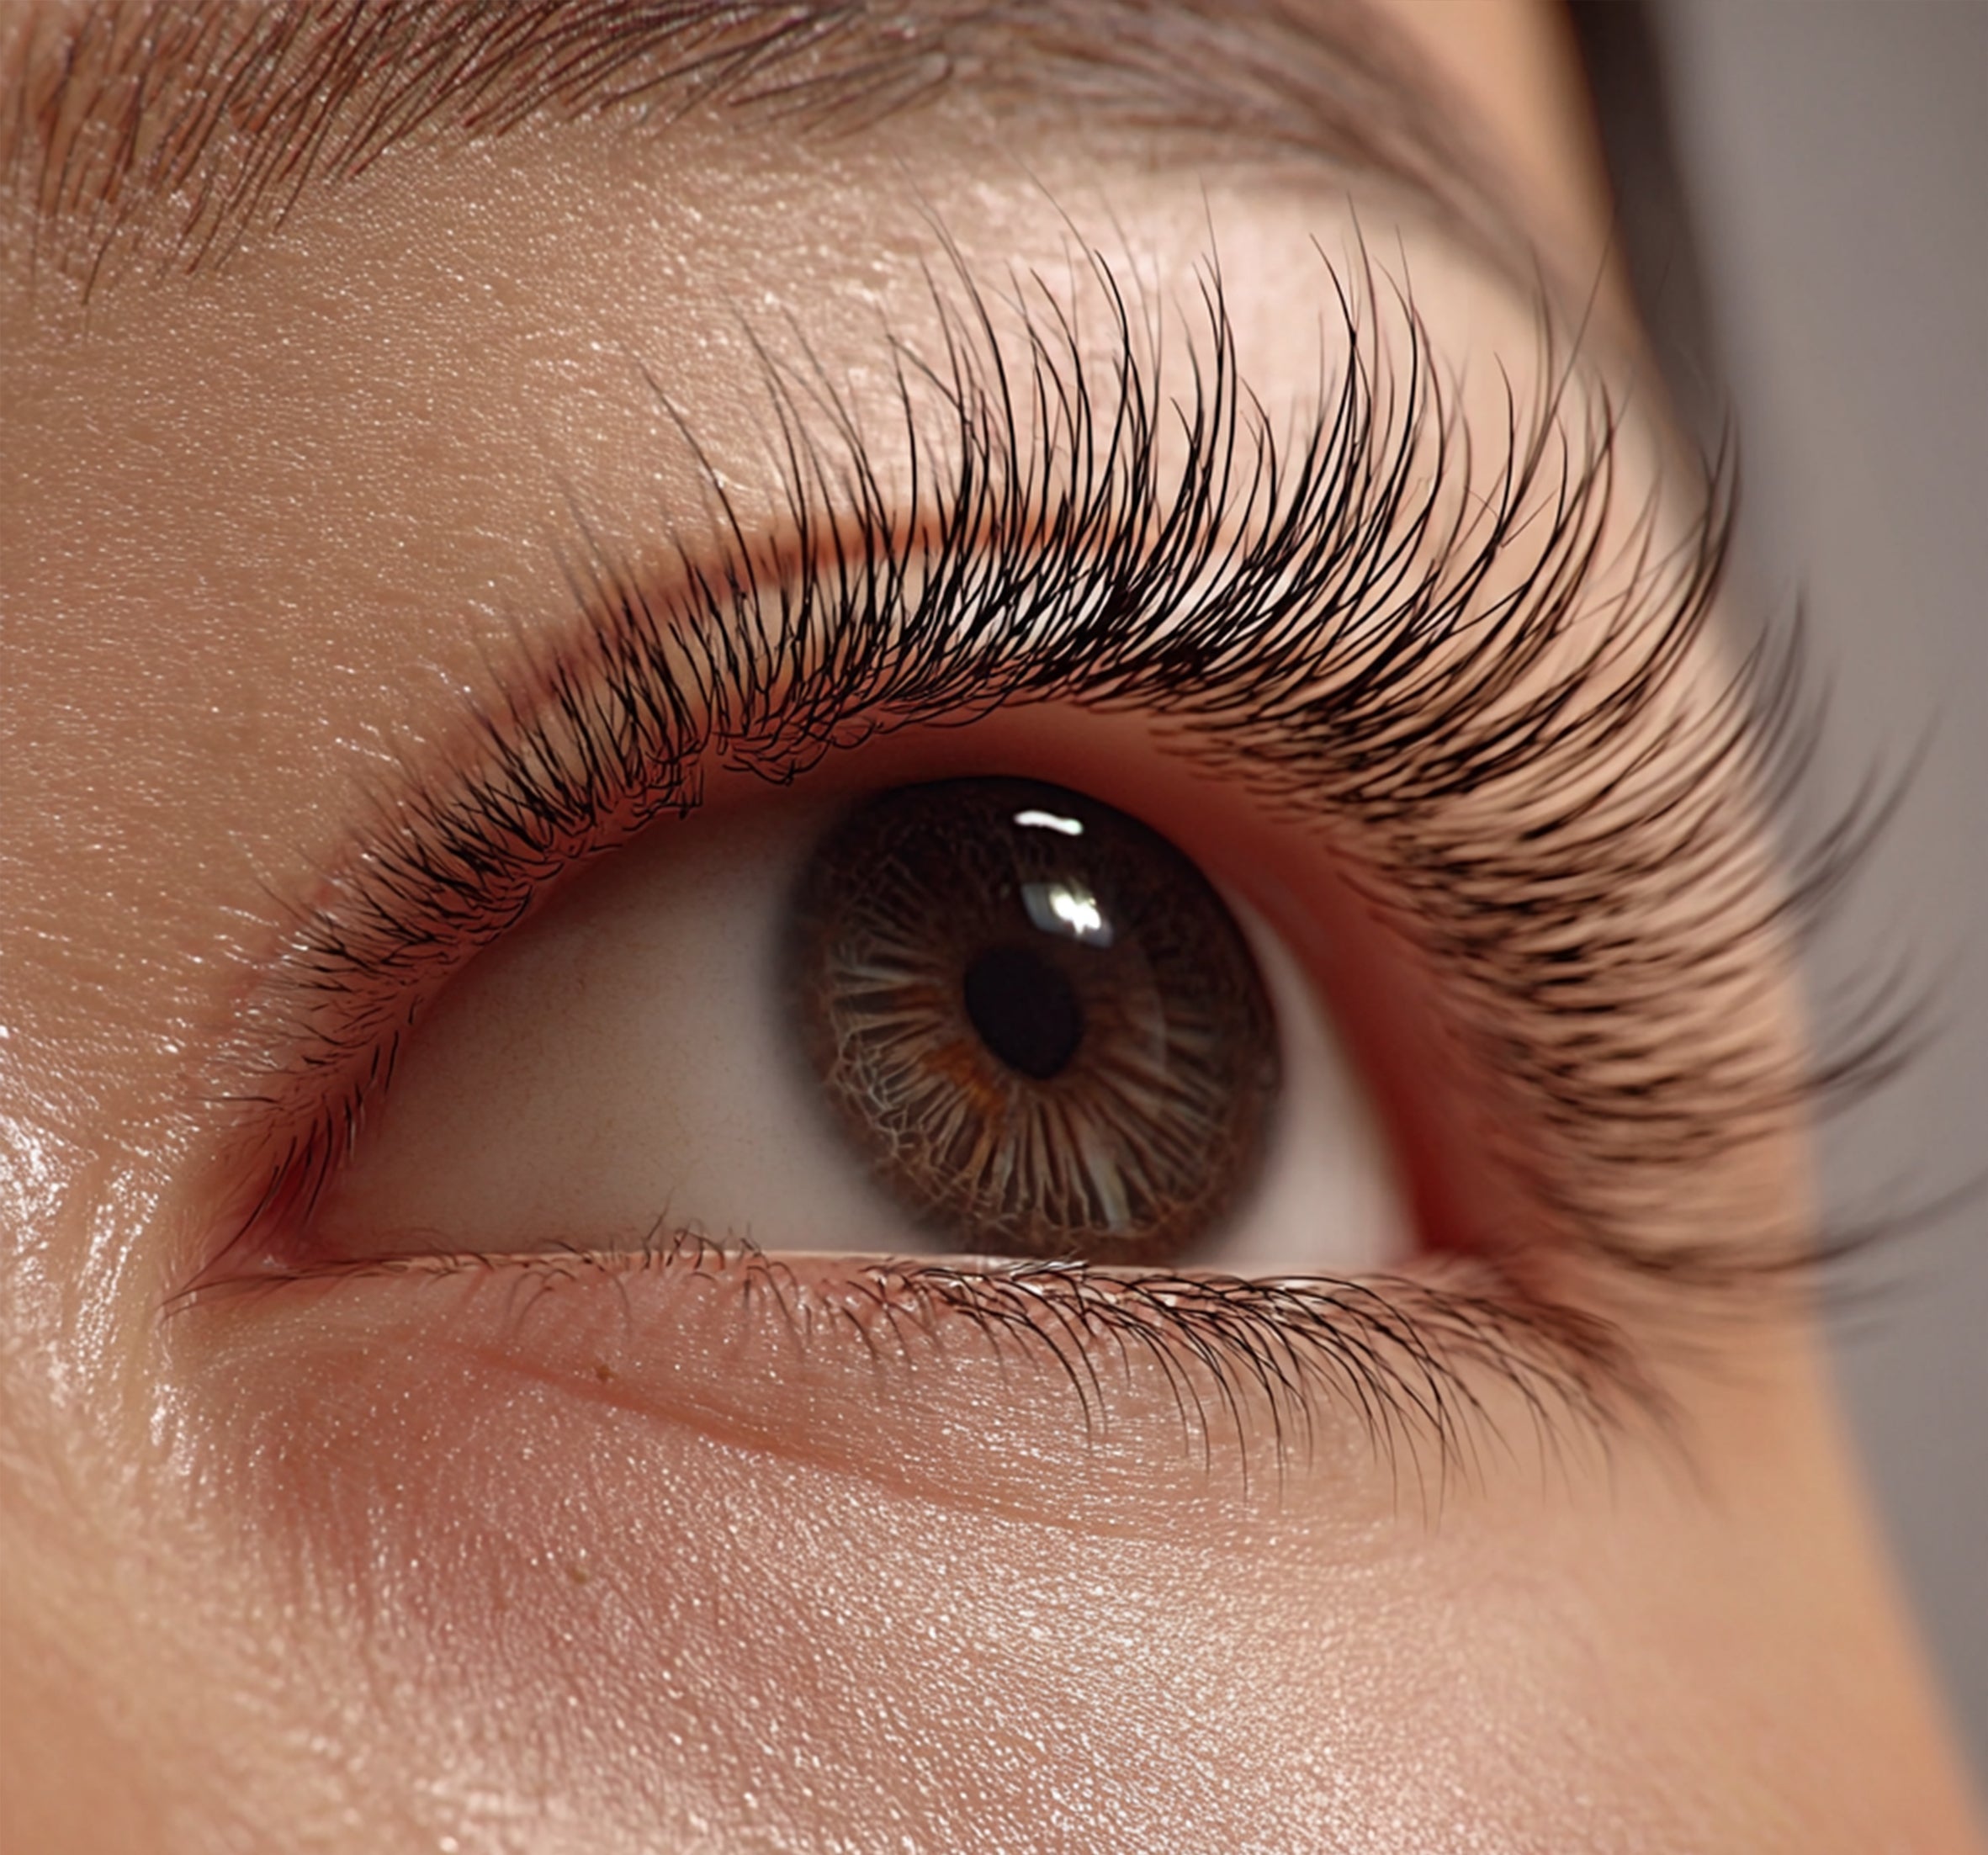
Every lash artist’s got that client — you know, the one who walks in batting lashes so curly they practically wave back at you. They sit down, blink twice, and you can already tell this set’s gonna be a journey.
Natural lashes too curly or crisscrossed natural lashes are beautiful in their own right, but for lash extensions? They can be a handful. These wild curves can mess with isolation, wreck symmetry, and make bonding feel like trying to glue two magnets that hate each other.
If you’ve ever spent half your eyelash extensions appointment talking yourself through each lash (“okay… just breathe… one at a time”), you know the struggle. But here’s the good news — with the right techniques, tools, and a little lash zen, even the twistiest lashes can be tamed into a clean, gorgeous set.
Why Do Some Natural Lashes Curl Like That?
Curly natural lashes are kind of like that one friend whose hair defies every straightener known to mankind — it’s just their DNA doing its thing. Some people are born with tight lash curls that turn up at sharp angles. Others? Their lashes get that way from years of over-curling, heat exposure, or a lash lift that went a little too hard.
Kind of like lash “muscle memory.” Once those tiny hairs have been over-processed or bent out of shape, they like to keep their flair — and that makes isolation tricky. Sometimes you’ll even find lashes curling in different directions on the same eye. It’s like a crowd of fans all cheering in different directions — a little chaotic, but fixable.
Your first step as a lash artist is detective work: figure out what you’re dealing with. Are they naturally curly? Chemically lifted? Fried from heat? The “why” tells you how to proceed — and more importantly, what not to do.
What Happens When You Lash on Top of Too Much Curl
Let’s be real — trying to apply extensions to super-curly lashes without prep is like trying to put a sticker on a balloon. It’ll stick… but not for long.
Here’s the short version of the long list of headaches that come with extreme curl:
- Isolation struggles – Lashes crisscross so much, you’re isolating one and two more sneak in like uninvited guests.
- Bad attachment angles – The curve leaves almost no flat surface for bonding.
- Poor retention – Less contact = less staying power. Those pretty fans will peace-out early.
- Crooked direction – You’ll end up with lashes pointing north, south, and spiritually sideways.
- Extra time – You’ll be in your perfectionist era… whether you like it or not.
Bottom line: the curl’s gotta chill before you can build something beautiful.
The Lash Artist’s Eye Exam: Assess Before You Attach
Before you even uncap your adhesive, grab your mirror and really look at your client’s lashes. We’re talking detective-level observation — Sherlock Holmes with tweezers.
You’re checking for:
- Curl direction and uniformity
- The base angle near the lid
- Lash strength and density
- Evidence of previous lifts or perms
If the lashes are so curled that they practically hug the lid, you’ll never get a good bond. That’s your cue to talk to your client about a gentle relaxation step or adjusting your extension curls.
And remember: if those natural lashes are dry, brittle, or clearly traumatized from a past service — hit pause. Tell your client to give their lashes some TLC (serum, rest, hydration) before you go in again. You can’t build a mansion on a cracked foundation.
Techniques to Tame the Curl (correcting curled natural lashes)
1. The Warm Welcome
Start with a warm compress. It softens the lash cuticle and relaxes tension, kind of like a spa day for lashes. Follow with a gentle lash cleanser — because clean lashes are happy lashes.
2. Keratin or Lash Relaxer Magic
How to relax overly curled natural lashes? Keratin-based lash relaxers can lightly ease that curl without damage. Think of it as yoga for lashes — just enough to stretch them out without snapping anything. But timing is everything: overdo it, and you’ll overprocess. Follow the brand’s instructions like gospel.
3. Let Them Rest Before Extensions
Don’t jump from relaxing to gluing — that’s a one-way ticket to chemical chaos. Give those lashes time to neutralize and breathe.
4. Know When to Say No
If the lashes look weak or over-lifted, walk away. Recommend growth serums, conditioning, or even a lash rehab month. A good artist knows that sometimes the best service is saying, “Not yet.”
Lash Mapping for the Curly Crew
Now that your client’s lashes are calmed down, lash extensions for curly natural lashes mapping becomes your secret weapon.
- Curl Compatibility: Match best lash extensions for curly lashes, the natural curve with M, L, or LC curls — their flatter base grabs better onto curved naturals.
- Directional Tweaks: How to apply lash extensions on curly lashes? Each lash has its own mind — go with it, not against it. Work in micro-sections to keep the line even.
- Length Logic: Don’t go too long — longer extensions make curls twist harder. Mid-lengths give that lifted, elegant look without adding torque.
- Angle Awareness: You might need to attach mid-shaft instead of base for the best hold. A little flexibility goes a long way.
Pro tip? Keep both eyes balanced. If one side grows curlier, you might need different curls per eye — it’s not cheating, it’s artistry.
Adhesive + Bonding Tips That Actually Stick
This is where skill meets science.
- Isolate like a pro — one lash at a time, no lash left behind.
- Use enough glue to coat but not drown. Think dewdrop, not raindrop.
- Prime with purpose — primers help reduce oil and tension on curly lashes.
- Add a sealant for that “bulletproof” eyelash extensions finish.
Remember, retention isn’t about luck — it’s about surface area. More contact = more commitment. You want your extensions and naturals to be in a healthy relationship, not a situationship.
Rookie Moves to Avoid
Even the best artists slip sometimes, but these are the no-go zones:
🚫 Forcing direction — let the lash be, don’t fight nature.
🚫 Drowning in glue — heavy adhesive = twist city.
🚫 Ignoring curl type — mismatched curls make lashes look chaotic.
🚫 Skipping prep on old lash lifts — that’s like painting over glitter without primer.
🚫 Lashing on damaged lashes — they’ll break before your next refill.
Lashing is part technique, part intuition. Trust your eye, not your ego.
Client Aftercare — Because Your Work Deserves Better
Clients love their new lashes, but it’s your job to remind them: lashes are delicate divas. Treat them right or they’ll walk off set.
- Skip heat and steam for the first 48 hours.
- Cleanse daily with a lash-safe shampoo.
- Brush in the natural direction — not like they’re detangling a wig.
- Avoid waterproof makeup and oil-based products.
- Book touch-ups every 2–2.5 weeks to keep the line crisp.
Tell them: “Your lashes are extensions, not indestructibles.” Because nothing ruins your masterpiece faster than mascara and tears.
The Big Picture
Working with overly curled lashes isn’t for the faint of heart — but it’s where your artistry really shines. Anyone can lash a straight lash; only a true pro can take a wild lash and make it look like poetry.
Understanding the root of the curl (pun intended), relaxing when needed, and adapting your mapping and bonding approach will set you apart from the rest.
Lash artistry isn’t just about eyelash extensions — it’s about transformation. You’re not just giving someone longer lashes; you’re helping them see themselves differently. Literally.
So next time a client blinks at you with lashes that look like they’ve been curled by Zeus himself, take a breath, grab your tools, and remember — you’ve got the eye for it.


Leave a comment
This site is protected by hCaptcha and the hCaptcha Privacy Policy and Terms of Service apply.