Retention: Fundamentals — A Guide for Lash Professionals
Let’s talk about something every lash artist obsesses over: lash retention. You can craft the most flawless lash set, but if those beauties start shedding like autumn leaves before their time comes, your clients won’t be happy—and neither will you or your reputation. So, what’s the secret sauce to keeping those lashes locked in place? It’s a mix of science, skill, and knowing how to control the environment like a true pro. Read on our lash retention tips, and let’s take this road to flawless lashes.
What Is Lash Retention, and Why Does It Matter?
Eyelash retention is the amount of time eyelash extensions stay attached to natural lashes before falling out. Sounds simple, right? Not so fast. Many factors influence retention—some in your control, some not. A natural lash shed cycle is normal, but when extensions don’t last at least a few weeks, something’s off.
A lot of artists blame the glue. Clients blame their skincare. But the truth? Retention issues usually come from improper application, weak prep, or environmental mishaps. Understanding what’s happening at every stage of the process separates lash amateurs from true lash bosses.
Let’s break it all down so you can master the art of retention and keep your clients coming back to you for those full, fabulous lashes.
Environmental Factors That Make or Break Retention
You wouldn’t bake a cake in a broken oven and expect it to turn out right. Same goes for lash application—the environment has to be dialed in.
1. Humidity: The Glue’s Best Friend (or Worst Enemy)
Professional lash glue is moisture-activated. That means humidity in your workspace directly affects how fast (or slow) the glue cures. Too dry? The adhesive turns to that sloth from Zootropolis, leading to weak bonds and poor retention. Too humid? The glue cures too quickly, creating brittle bonds that don’t last.
The magic number? Well, that depends on your glue. Typically, it’s 50–70% relative humidity (RH). However, there are adhesives that work in a wider range, designed for those who struggles with humidity adjustment. Some glues offer 30-75% range and can be an answer to lash techs prayers. Nevertheless, we recommend using a hygrometer to keep an eye on it and adjust with humidifiers or dehumidifiers as needed.
2. Temperature: The Silent Saboteur
Too hot and your glue cures before you can attach the extension. Too cold and it won’t set properly.
Ideal range: 70–74°F (21–23°C). Keep your lash room in this sweet spot, and you’ll notice a difference in retention.
3. The Right Tools for the Job
Hygrometer: Monitors humidity and temp.
Humidifier/Dehumidifier: Keeps moisture in check.
Air Conditioner or Heater: Stabilizes temperature fluctuations. Set your space up for success, and you’ll see fewer retention nightmares.
Pro Tip: Don’t wanna buy some expensive stuff for your lash room? All that science causes you headache? Solution exists. Just add glue Booster before you start lashing and it will magically adjust your glue performance so it complies with your environment. Sweet!
Lash Adhesive: Use It Like a Pro
All glues are different like snowflakes, and using the wrong one can be a disaster. Fast-drying adhesives are great for experienced techs, but if your work pace doesn’t match the glue’s drying time, you’ll get a weak bonding.
Matching Glue to Your Speed
- Fast drying (from 0.3-1 sec): For seasoned lash slayers.
- Medium drying (1–2 sec): Great for those refining their technique.
- Slow drying (4-6 sec+): Ideal for beginners needing more time to place lashes.
Pro Tip: Remember that Glue Booster we talked about previously? Well, humidity control is just one of its talents. It can turn your favorite but slow glue into a fast-drying one. Apply it to the lashes before application and watch your glue dries faster as your skill grows.
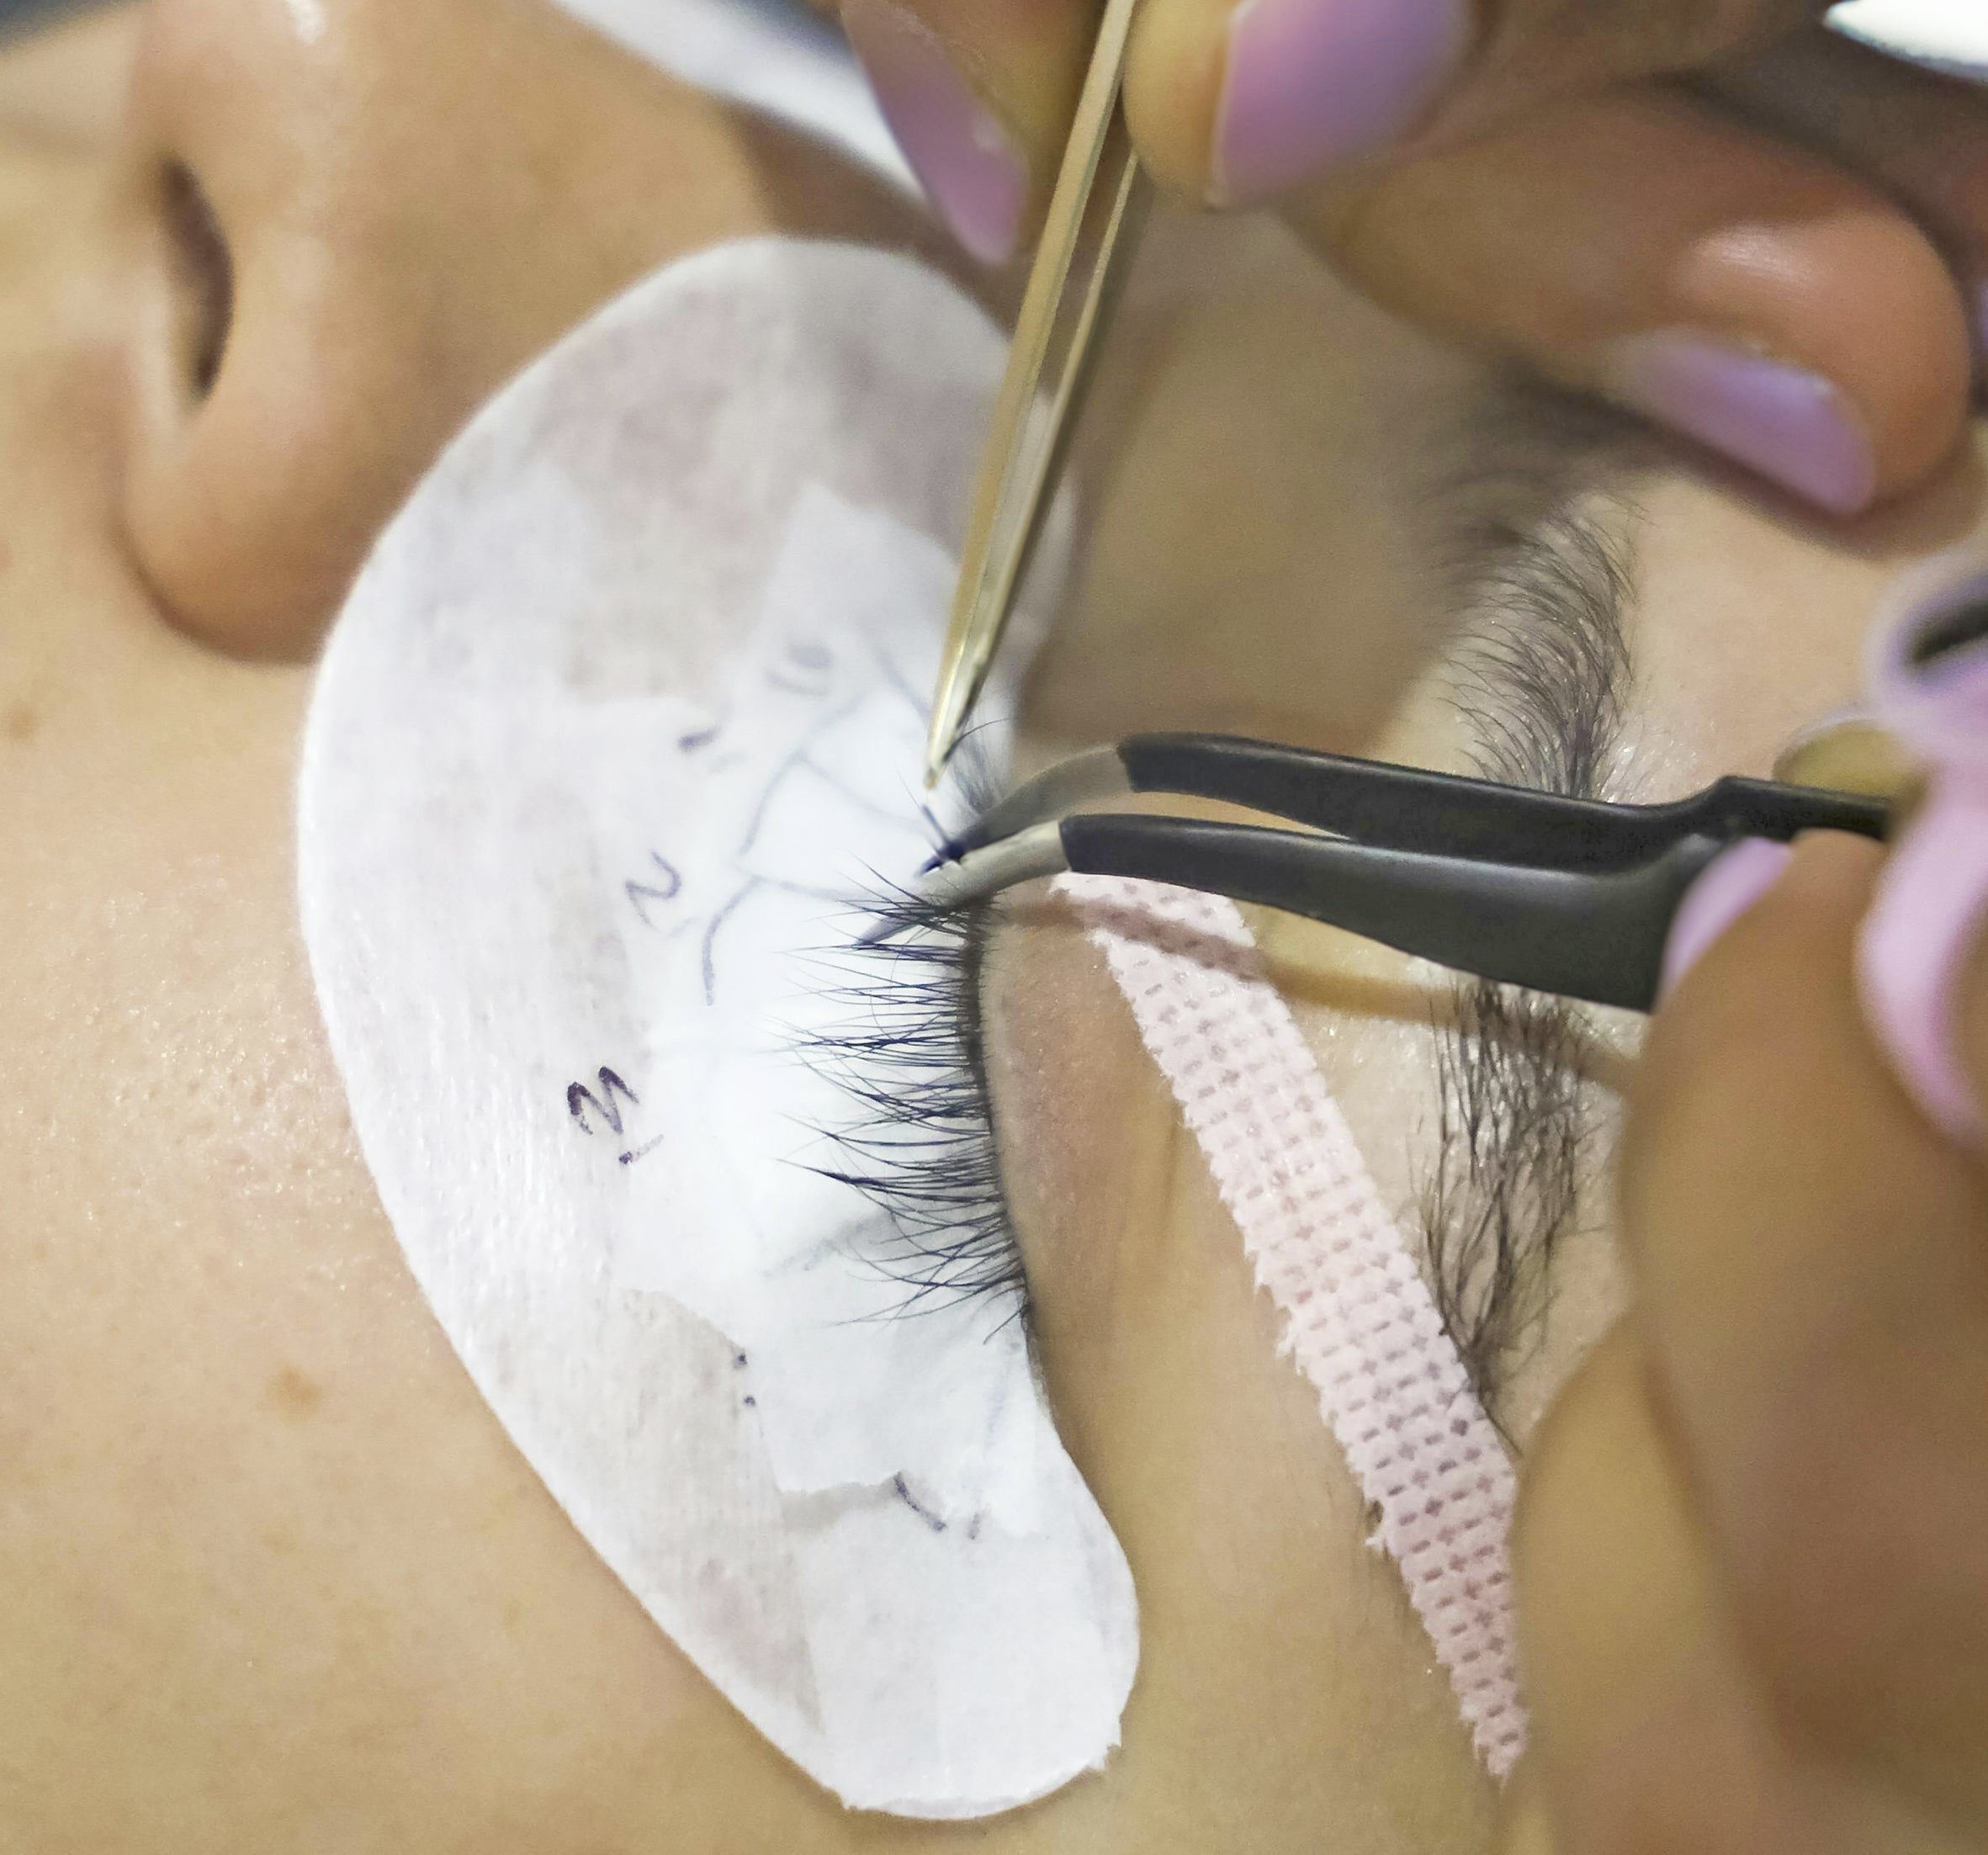
Prepping Lashes Like a Retention Rockstar
Dirty natural lashes are like a super villain to your James Bond. We mean, your lash bond. Thus, it’s a bad idea to apply the extensions without proper cleansing. Oils, makeup, and residue create a barrier that keeps adhesive from bonding.
The Golden Prep Routine:
Cleanse – Use an oil-free, lash-safe cleanser to remove dirt and makeup.
Prime – Apply primer to remove excess oils and balance pH.
Dry & Isolate – Make sure lashes are fully dry and perfectly separated before starting.
Pro Tip: Always remind clients NOT to wear mascara or oily skincare before their appointment. You’re a lash artist, not a magician.
Client Aftercare: Set Them Up for Success
Even if you do everything right, a client who abuses their lashes will wreck their retention. Educating them is your responsibility. You may think it ends after they close the door as they’re leaving but it’s not. Caring and supporting your clients defines you as a true professional worth every dollar they spent.
Lash Retention Commandments for Clients:
- No oil-based or alcohol-based products around the eyes.
- Keep hands off those lashes—no rubbing or pulling.
- Wash lashes daily with a lash cleanser to avoid oil buildup. Brush gently with a clean spoolie afterwards.
- Avoid lash curlers and sleeping on the stomach.
Offer aftercare kits with lash serum, lash shampoo, cleansing brushes, and spoolies. If you make aftercare easy, clients are more likely to follow through.
Lock in That Retention!
When clients know their lashes will last, they trust you. And in this industry, trust is everything. With refined technique, controlled environment, and client education—you’ll nail retention, building a business that sticks in the process.
And remember, every perfectly retained lash is like a little love letter from you to your client—proof that you care, that you’re a pro, and that they should never trust their lashes to anyone else. Keep that bond strong, and your client list even stronger.


Leave a comment
This site is protected by hCaptcha and the hCaptcha Privacy Policy and Terms of Service apply.