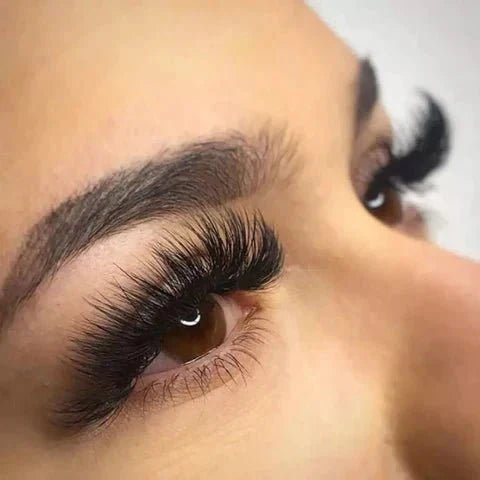
The Checklist for Magnificently Done Eyelash Extensions
Whatever work you do, it needs checking in the end. When we check our work, we can find all the flaws in it and eliminate them. To make the results perfect, it’s important for a lash artist not just to brush the eyelash extensions with tweezers for 1 to 2 minutes but inspect everything to the tiniest detail, assessing each aspect.
Checking on the lashes in the anagen phase or inner/outer corners won’t need more than just a visual assessment, while other aspects, such as, for example, checking the bonding power and looking for the clumps, will require additional measures.
When you just study to become licensed, your educator always evaluates your work, helps with comments and suggestions. When you start taking clients, you can easily validate your work yourself and find mistakes you need to work on. We’ll share a mini checklist with you to validate your work — 7 most important criteria you have to assess at the end of the eyelash extension procedure. Save it!
Look for the clumps
We’ve already written about this earlier in the article called “Clumpings?!”. Read again how to look for the clumps and where you can make mistakes when checking.
Check the bonding power
Check every single extension. Yes, exactly, each and every one, even if you’re absolutely sure you’ve applied them damn well! If you’ve checked each extension, you may not worry about the retention even if your client doesn’t always follow all the aftercare tips. If you neglect thorough checking, you cannot be sure the client’s lashes won’t fall off after her sleep face to the pillow.
Check the fullness
While you are looking for clumps and testing the strength of the bond, you can also find some missed natural lashes, and lash them too, thus making your set look fuller. A life hack: when you apply an extension to the natural lash, leave this place for a while and start checking from the opposite side of the eyelid. This approach will allow you to prevent the newly attached extensions from clumping together, and you won’t have to check everything all over again. Make sure you do not miss inner and outer corners, and check if your work looks full and completed overall.
Control the natural lash growth cycle
Make sure you use the correct eyelash extension length for each lash growth phase.
Control the detachments
To check whether your extensions tend to detach sideward or at the bottom, lift every lash slightly and look at it a bit from aside when validating your work results. In this case, you may see gaps under the extension. If you find such gaps, remove these extensions and replace with the new ones.
Control the distance from the lash line
When you have everything done, you can easily see if some extensions are applied too far or too close to the lash line. We advise you to pay special attention to the bottom layer and eye corners in this regard. In these places, the distance from the lash line tends to turn out larger than it should be. If extensions are applied too close, they will be stabbing your client’s eyelids and fall prematurely, and if they are applied too far from the lash line, such extensions may get crisscrossed, and such work always looks messy.
If you see too large or too small a distance, take the time to remove such extensions and apply them in the correct places.
Control patches
This is the only check we should constantly make in the process, not at the end of the work. If you keep forgetting about it so far, set your timer for 20 minutes and check the position of your eye pads. If you fail to control patches or make sure your client’s eyes are closed all the time, the consequences of this only mistake will be impossible to eliminate as their eyes would be exposed to fumes! Therefore, be extremely cautious!


Leave a comment
This site is protected by hCaptcha and the hCaptcha Privacy Policy and Terms of Service apply.