Layering Techniques: How to Create Texture in Lash Sets
Needless to say that textured lash sets basically give off Beyoncé vibe—always trending, and impossible to ignore. Unlike those classic, cookie-cutter lash lines that play it safe, textured eyelash extensions bring the drama we are living for. We're talking about that wisp that brings effortless glamour and a kind of vibe that feels modern, flirty, and totally customized.
Let’s be real—today’s clients aren’t just looking for length. They want personality in their lashes. They want lashes that turn heads, spark compliments, and look bomb on TikTok. A textured set gives you the creative license to do just that—by blending lengths, curls, and diameters, you can sculpt a lash look that makes their eyes look like they used a TikTok filter… but without the filter.
Understanding Lash Texture
Eyelash texture is essential for volume. It’s not just low key doing your thing and hoping for the best. Textured sets are thoughtfully messy and it takes effort and attention.
Picture this:
- Wispy volume sets with longer spikes blended with soft, dense fans
- Hybrids that mix classic with fluffy volume
- “Kim K” style lashes with long dramatic peaks (hello, red carpet vibes!)
These styles are especially fab for clients who:
- Don’t vibe with the basic volume
- Want something trendy
- Have sparse lashes
Basically, textured lashes are the “cool older cousin” of classic sets—chill, stylish, and just a little rebellious.
Layering Techniques for Lash Artists: Where the Magic Happens
Creating texture is like making a lasagna—you’ve gotta layer it right, or it’s gonna be a mess. Let’s break down the recipe:
1. Mixing Curls
Using one curl across the whole lash line? That’s in the past. Instead, spice it up with a curl cocktail: Use C curls as your base for softness. Add D or M curls as the spicy spikes for drama. Try L curls on the outer corners to give that fox-eye lift. Place curls with purpose to enhance the client's eye shape.
2. Playing with Lengths
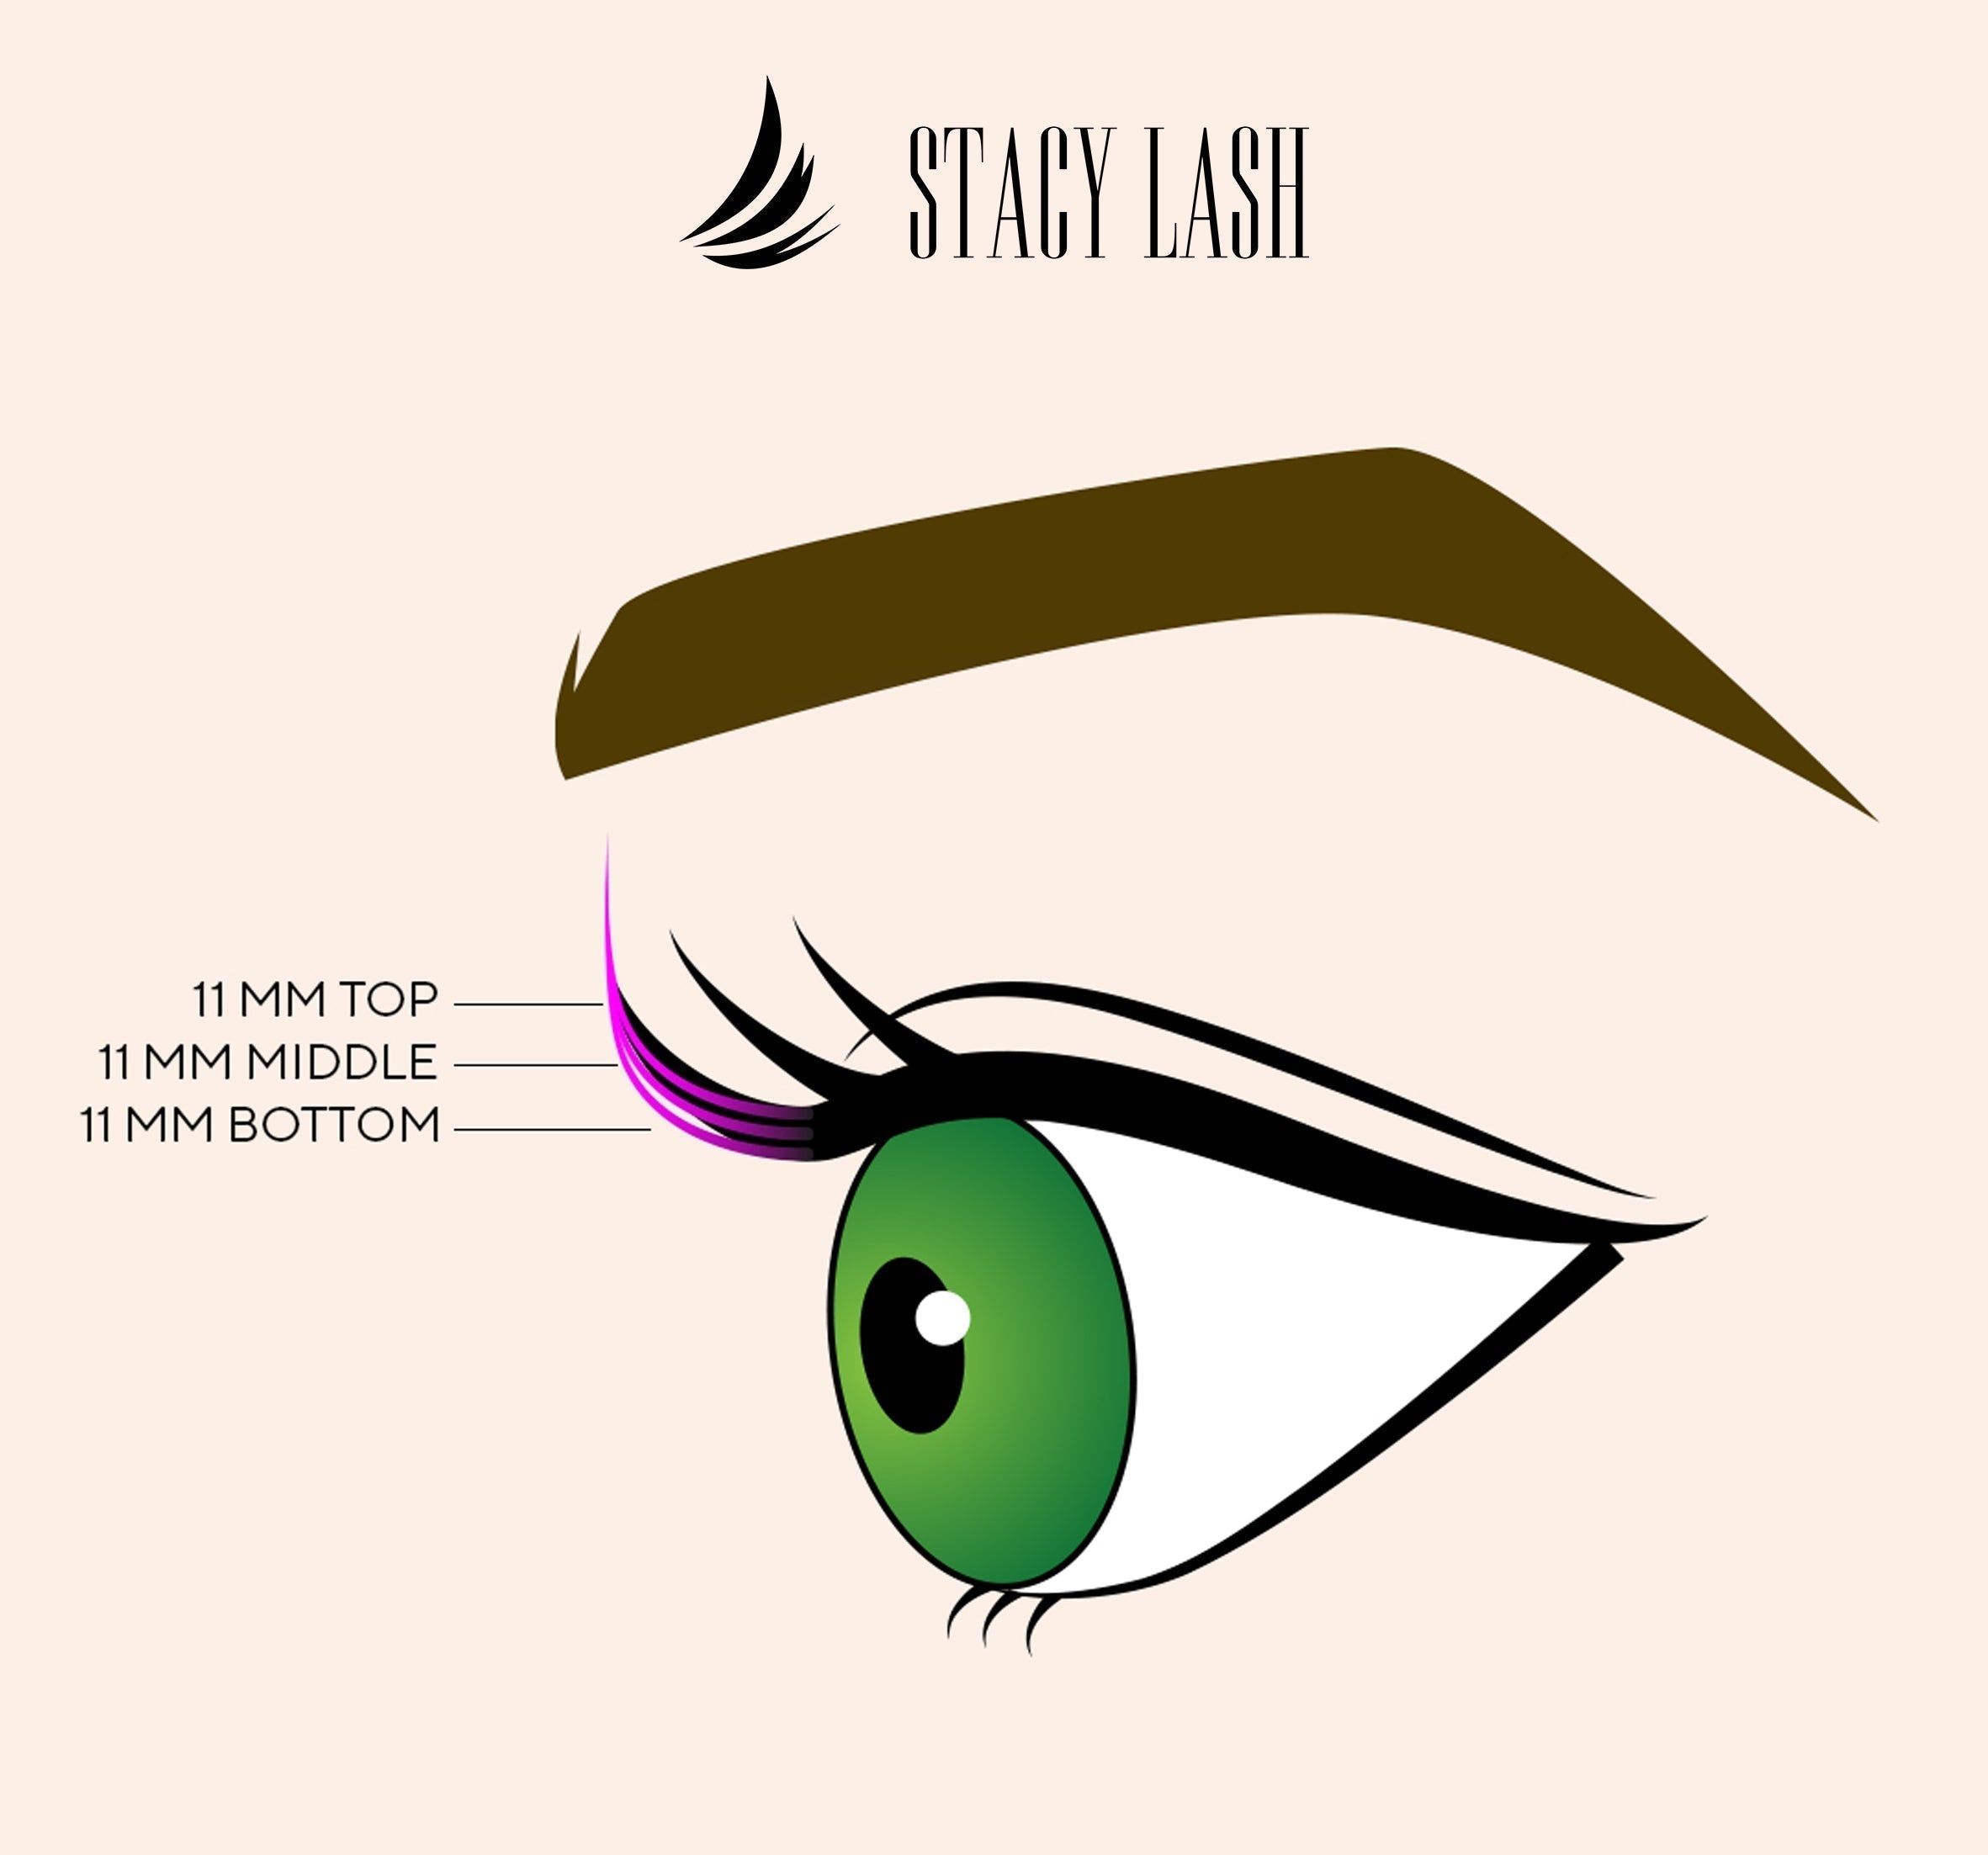
This is where things get real juicy. Alternate lash lengths in a strategic way, like use a range of 2–3 mm between spikes and base lashes. Try lash mapping like 9-11-13-11-9 to create peaks. Use the longest lashes sparingly to avoid overload. Texture should look intentional, not like your lashes got caught in a windstorm.
3. Varying Diameters and Lash Types
Mixing diameters is your secret weapon for texture and strength: Blend classic 0.15 mm lashes with volume fans (0.05–0.07 mm). Use thinner lashes for fullness, and thicker ones for bold points.
Pro tip: Mink-like matte lashes blend better for natural texture, while glossy lashes give more pop for clients who want that extra sparkle.
Designing a Textured Lash Set
Let’s talk about lash mapping, because even Picasso sketched before he painted.
Lash Mapping Tips:
- Use 3–5 different lengths in your map for vertical dimension
- Place spikes at the brow arch or center of the eye for a doll-eye effect
- For that sassy cat-eye, gradually lengthen toward the outer corners
Test your map on a mannequin head or lash pad first. Think of it like a dress rehearsal before the Prom night.
Volume & Variation Placement:
- Focus your volume on the mid and outer lash line for density without heaviness
- Leave the inner corners light and breathable
- Blend long spikes with fluffy surrounding lashes to soften the look
Texture is all about balance if you want it to look chic, not chaotic.
Common Textured Lash Mistakes
Even the best lash artists hit a few bumps when learning textured techniques. Here’s what to avoid:
Overloading the Lash Line:
Yes, spikes are fun. No, that doesn’t mean you need a million of them.
v Too many long lashes = drag queen realness (but not in a good way)
v Too much weight = natural lash damage and early fallout
Poor Curl Blending:
v When curls don’t transition smoothly, it can look like your client got lashes in the dark.
v Avoid abrupt shifts from one curl type to another
v Think gradual, feathered blending
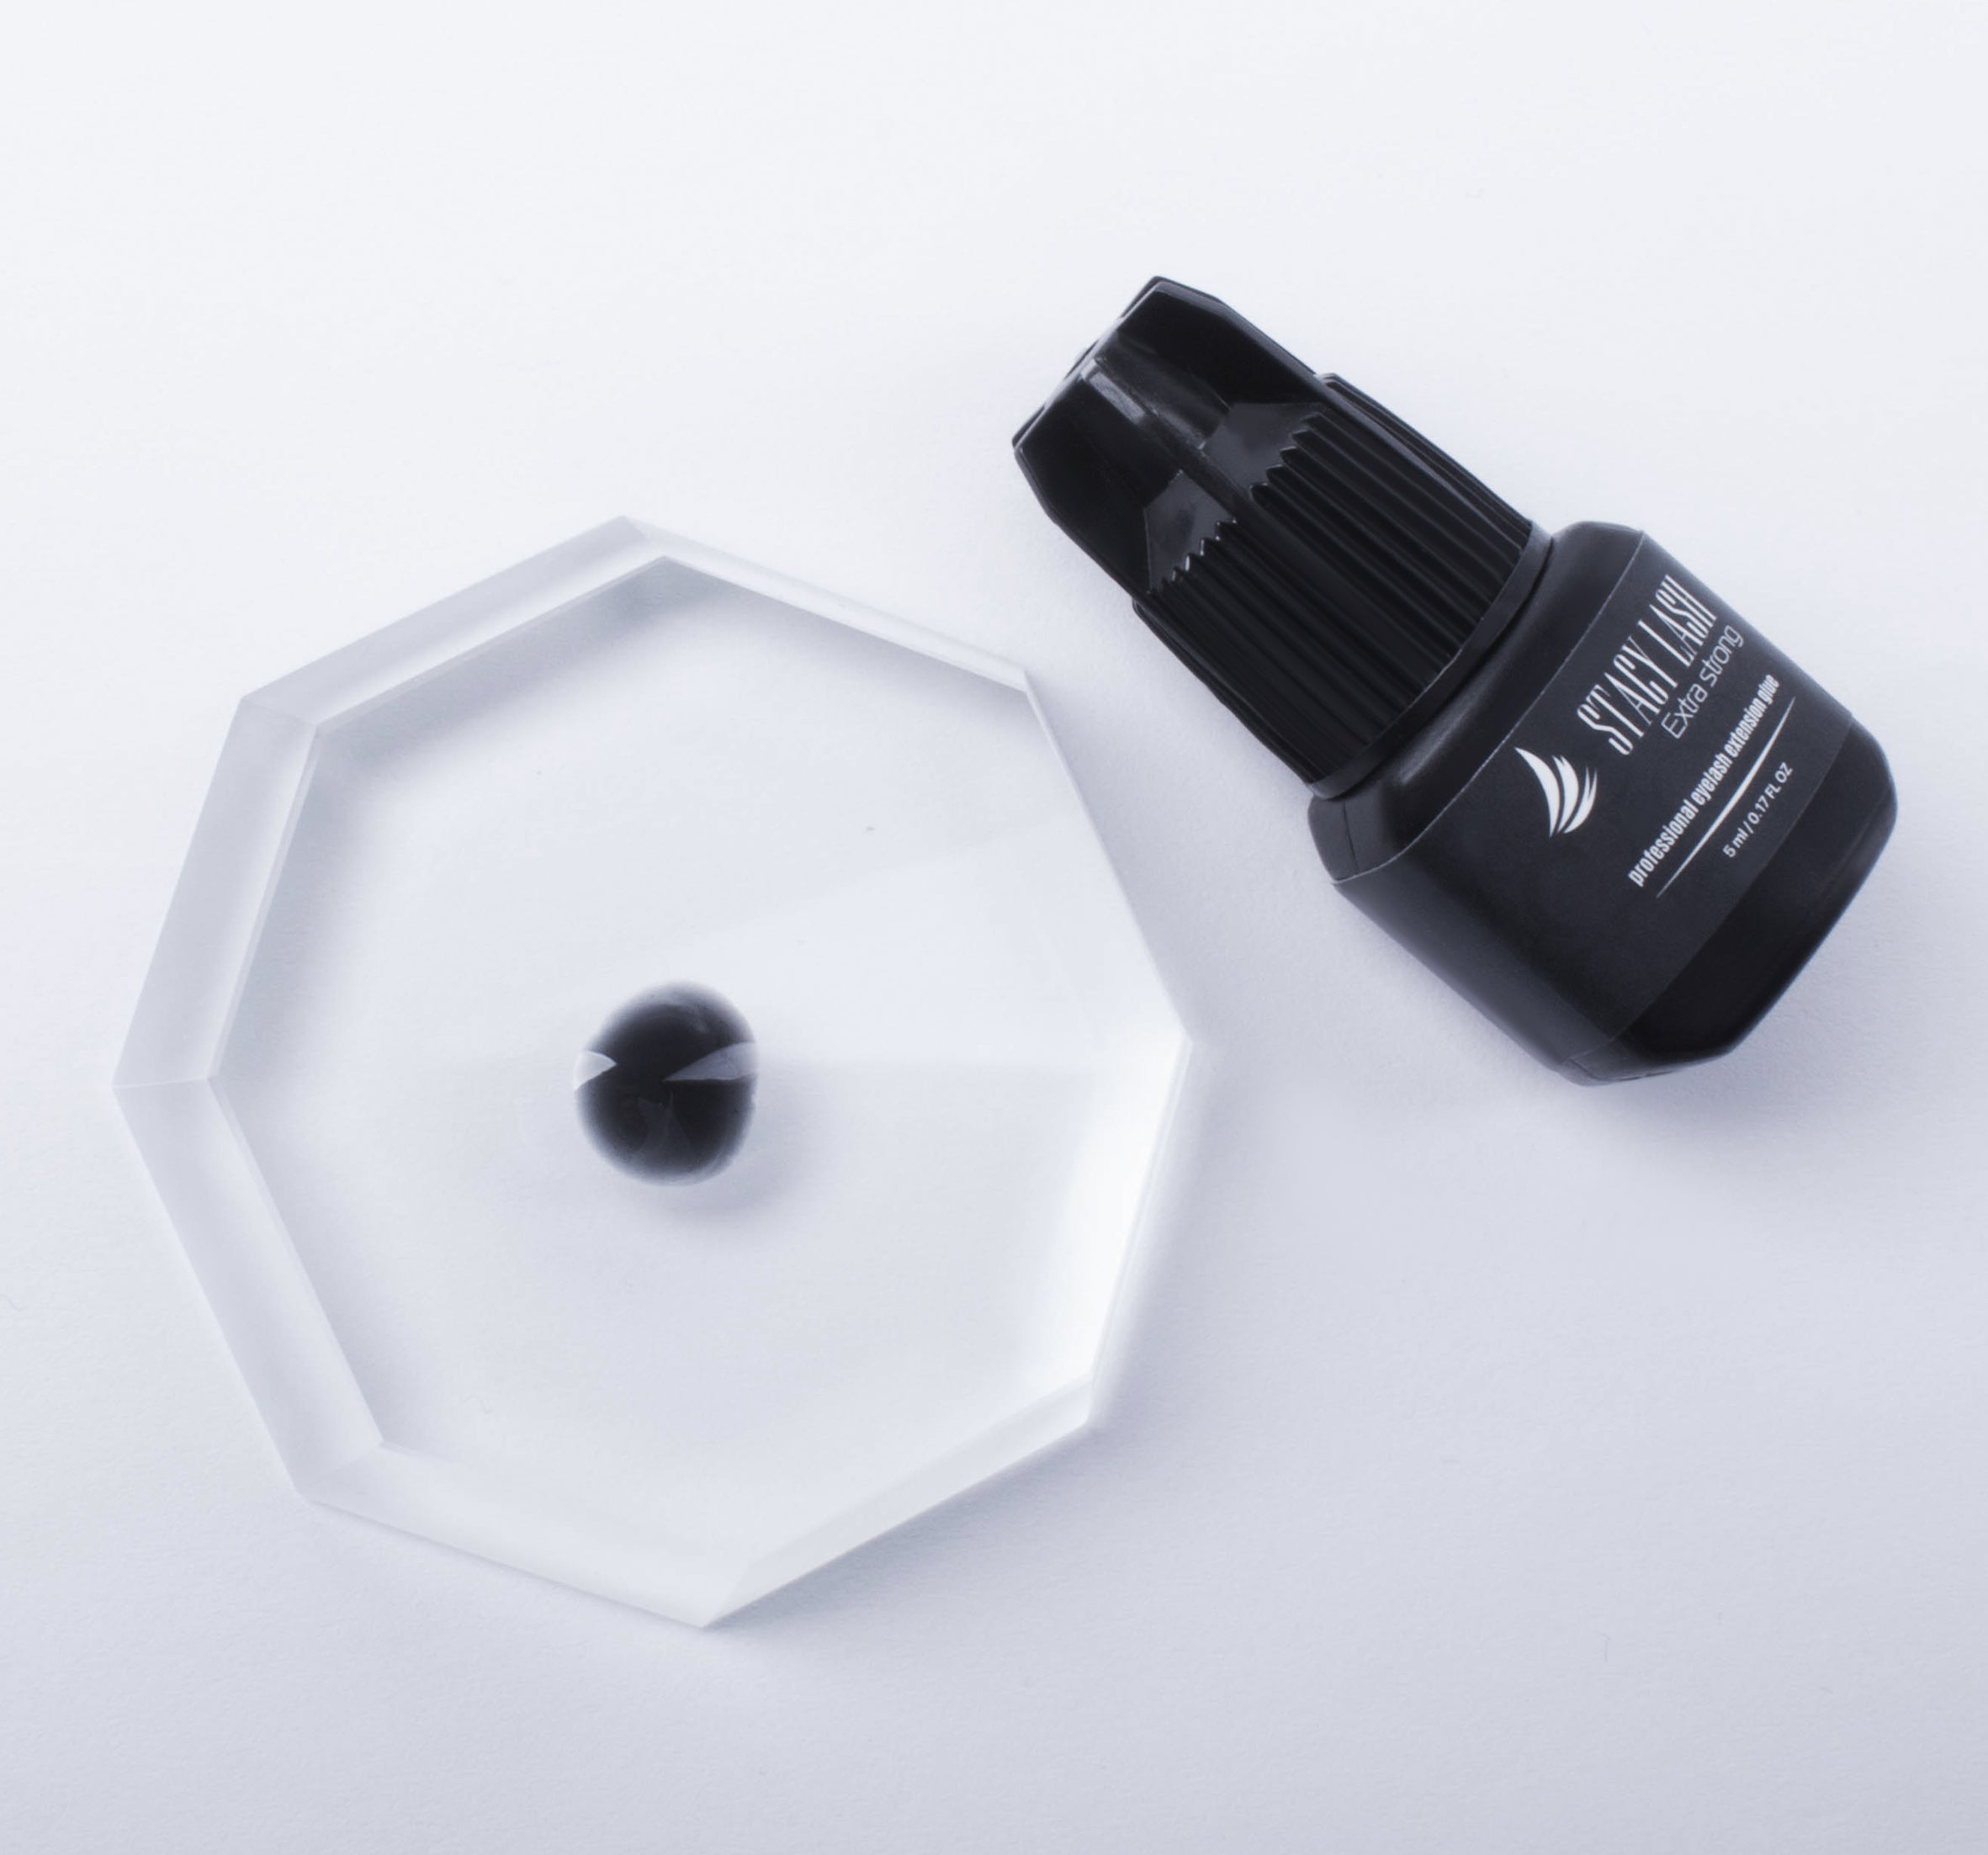
Best Products for Building Beautiful Lash Layers
If you want your lash game strong, your lash kit better be stronger.
Go-To Products:
C Tapered tip lashes: Soft and blendable, perfect for natural texture
C Lightweight volume fans (0.03–0.05 mm): Great for layering without bulk
C Mixed-length lash trays: Because digging through 10 trays mid-set is a buzzkill
Tools You’ll Love:
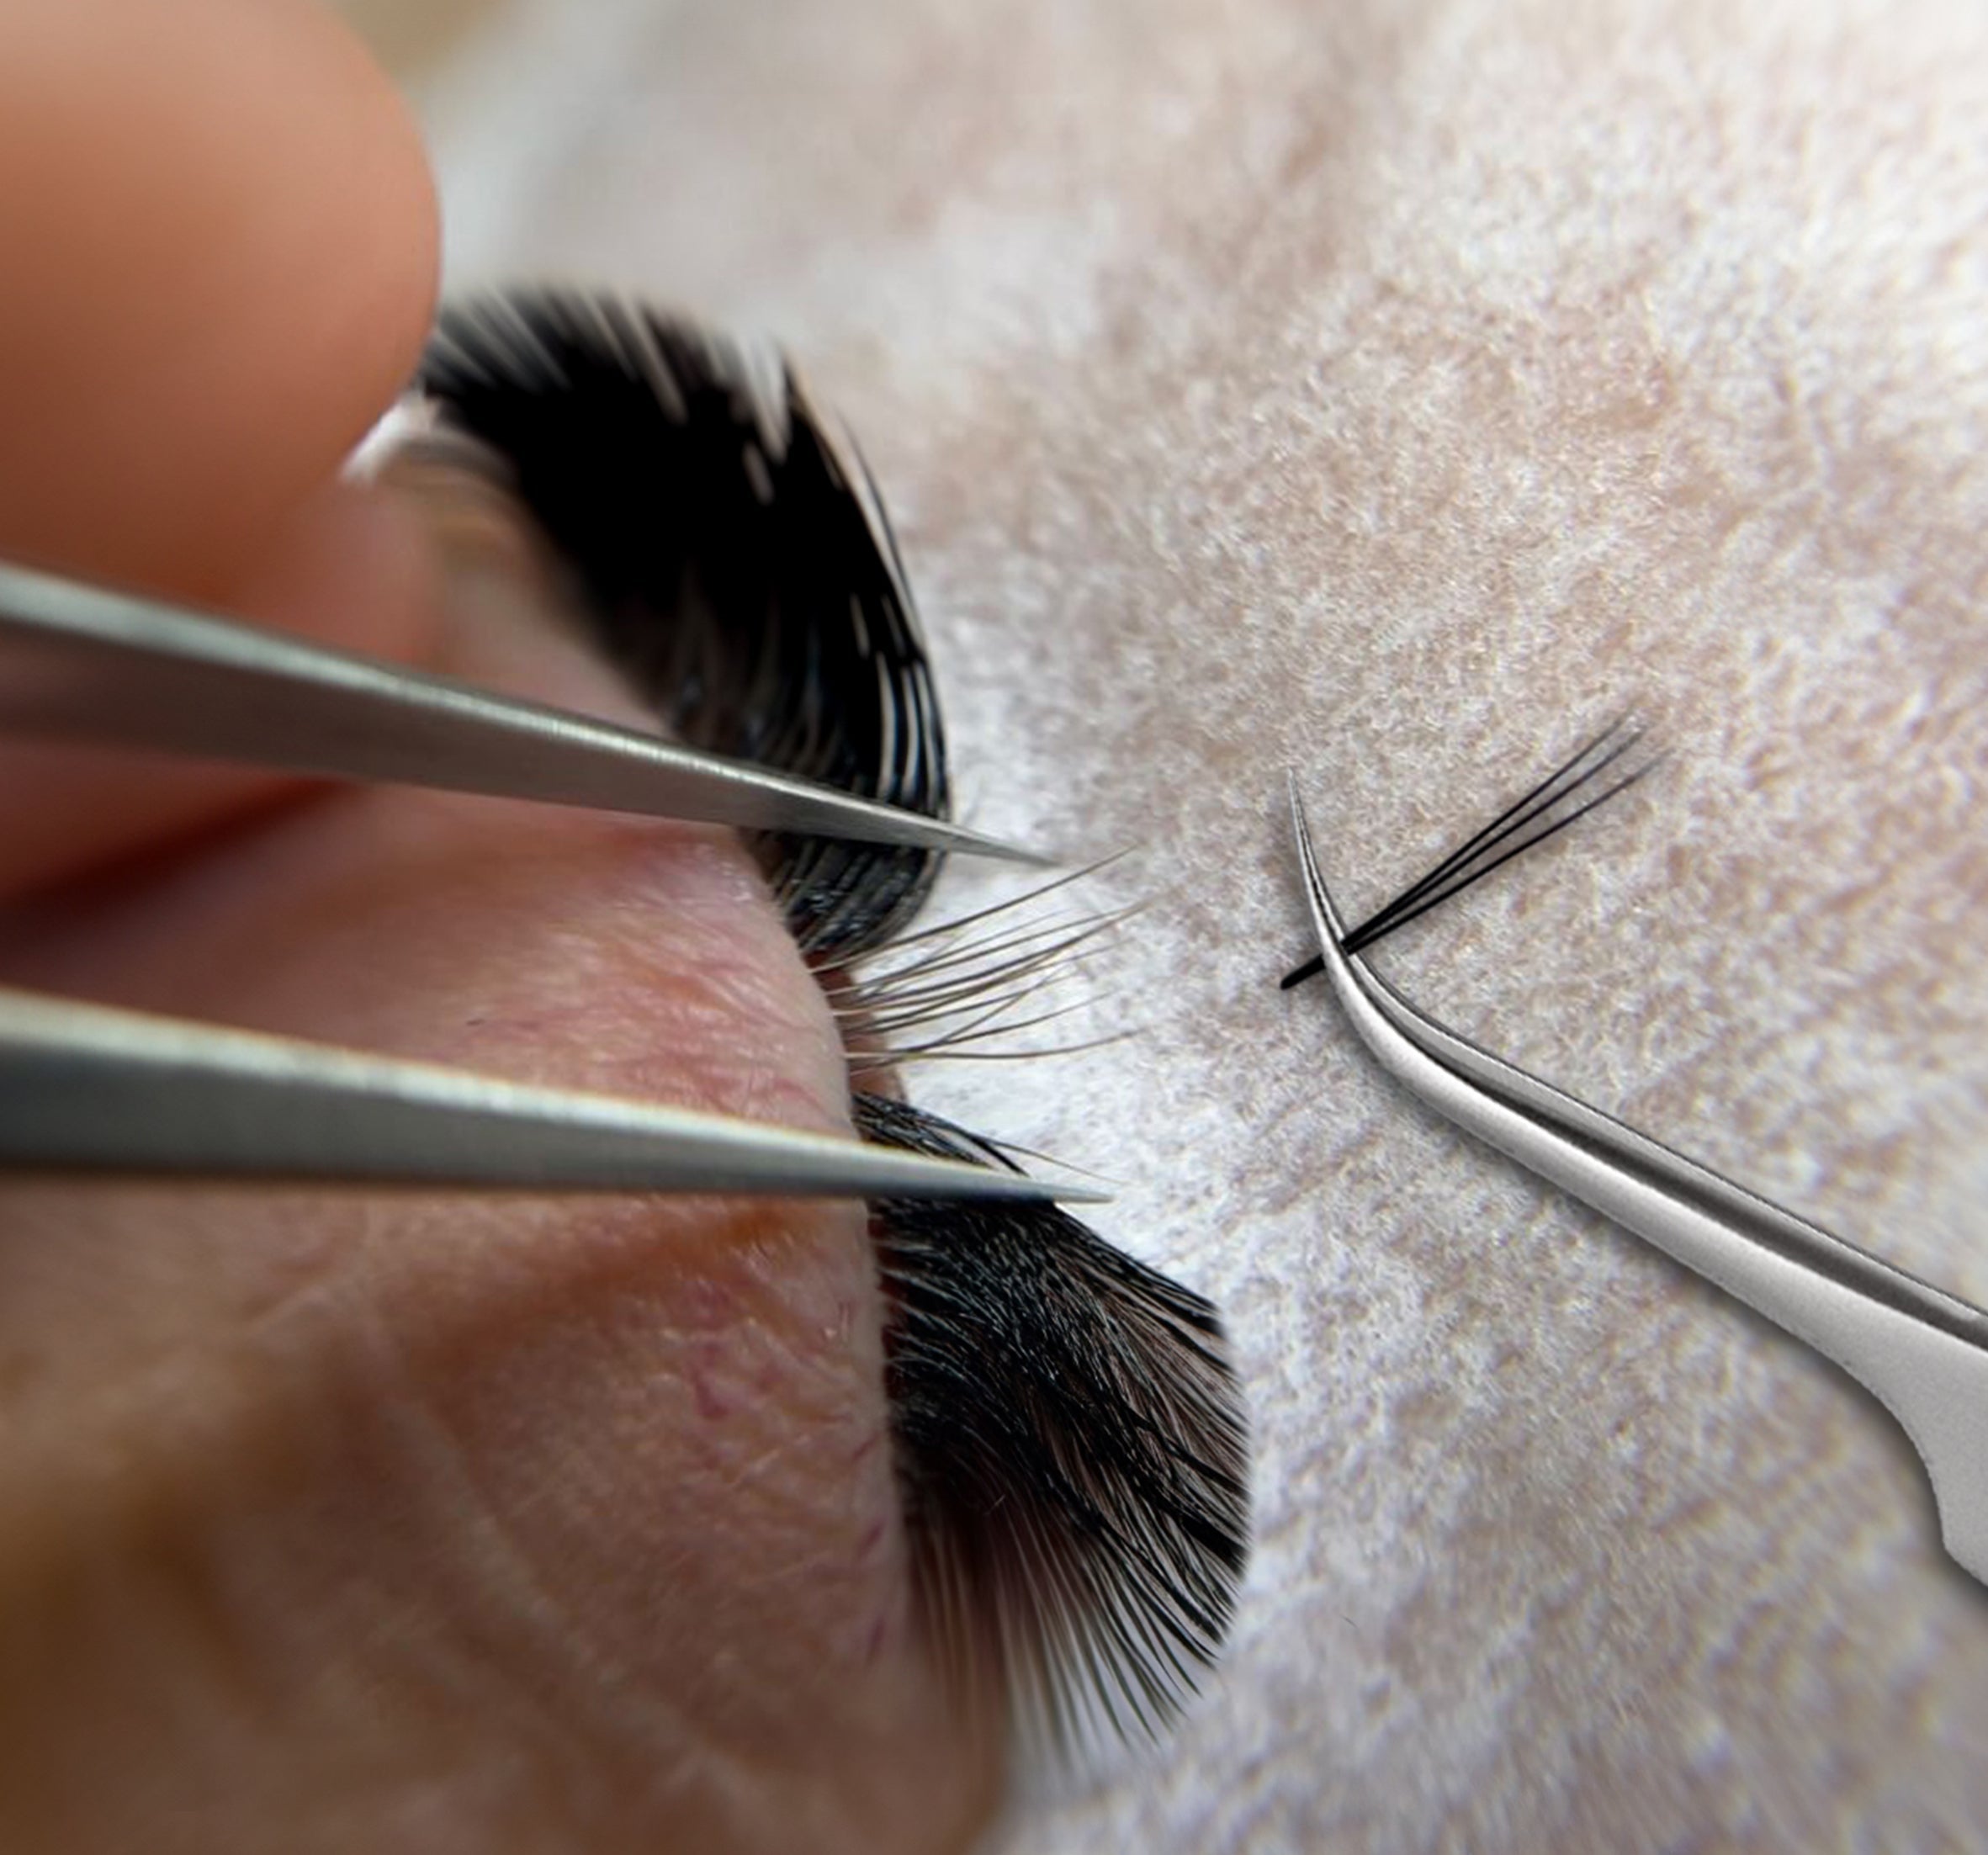
J Fine-tipped isolation tweezers for clean isolation
J Fast-drying adhesive for working with variable lengths
J A well-organized lash tile with labeled curls and lengths (thank us later)
When to Recommend Textured Lash Sets to Clients
Textured sets aren’t for every client, but when you know how to spot the right ones? That’s when the magic happens.
Perfect for:
- Influencer types who live on camera and need a “signature lash look”
- Brides or special event clients wanting soft drama
- Longtime lash lovers ready for a change
- Clients with fine, sparse lashes that need a little TLC and visual oomph
Not ideal for:
- Total beginners (start them with hybrid or light volume first)
- Super sensitive eyes—more variety = more handling
- Clients with strict work dress codes or very natural preferences
Client Education: Setting Expectations
Don’t forget to educate your clients. Texture might be trendy, but it still requires upkeep. Spiky sets grow out faster—make sure they know about 2–3 week fills. Some textured looks might require more cleaning (hello, lash shampoo!). Have before/after pics ready to show examples—Pinterest is your friend here. Set the stage properly, and clients will fall in love with the look and your expertise.
Master the Art, Make It Fashion
Textured lash extensions are where your lash skills meet your inner artist. With the right layering, mapping, and a killer product lineup, you can create custom lash sets that will win the hearts of your clients. Whether your client wants soft girl glam, moody drama, or Pinterest-perfect spikes, texture gives you the range to deliver.


Leave a comment
This site is protected by hCaptcha and the hCaptcha Privacy Policy and Terms of Service apply.